Bulk Sponsor Onboarding Emails
Last updated: December 16, 2025
There are several ways that sponsors can provide Finch the authentication to retrieve census and payroll information. One of those is to create and send Finch Connect URLs to administrators in the payroll system for that sponsor. You can generate these Finch Connect URLs in bulk from the Dashboard. Combined with PensionPro's bulk email capabilities, you can ease the process of onboarding hundreds of sponsors.
Step 1: Create a new Note Category in PensionPro
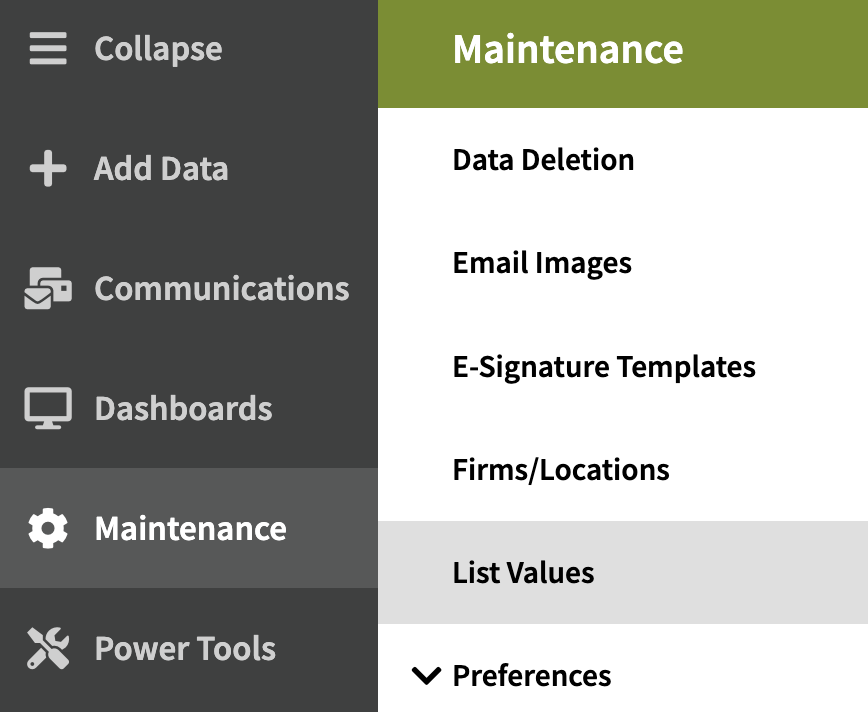
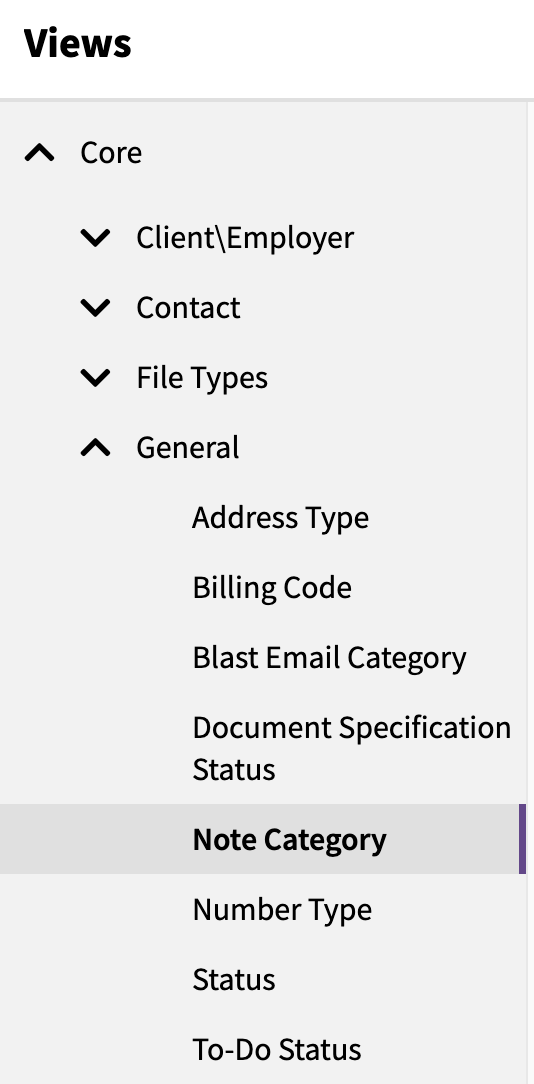
Step 1a: Navigate to the Note Category section
Go to Maintenance -> List Values -> Note Category
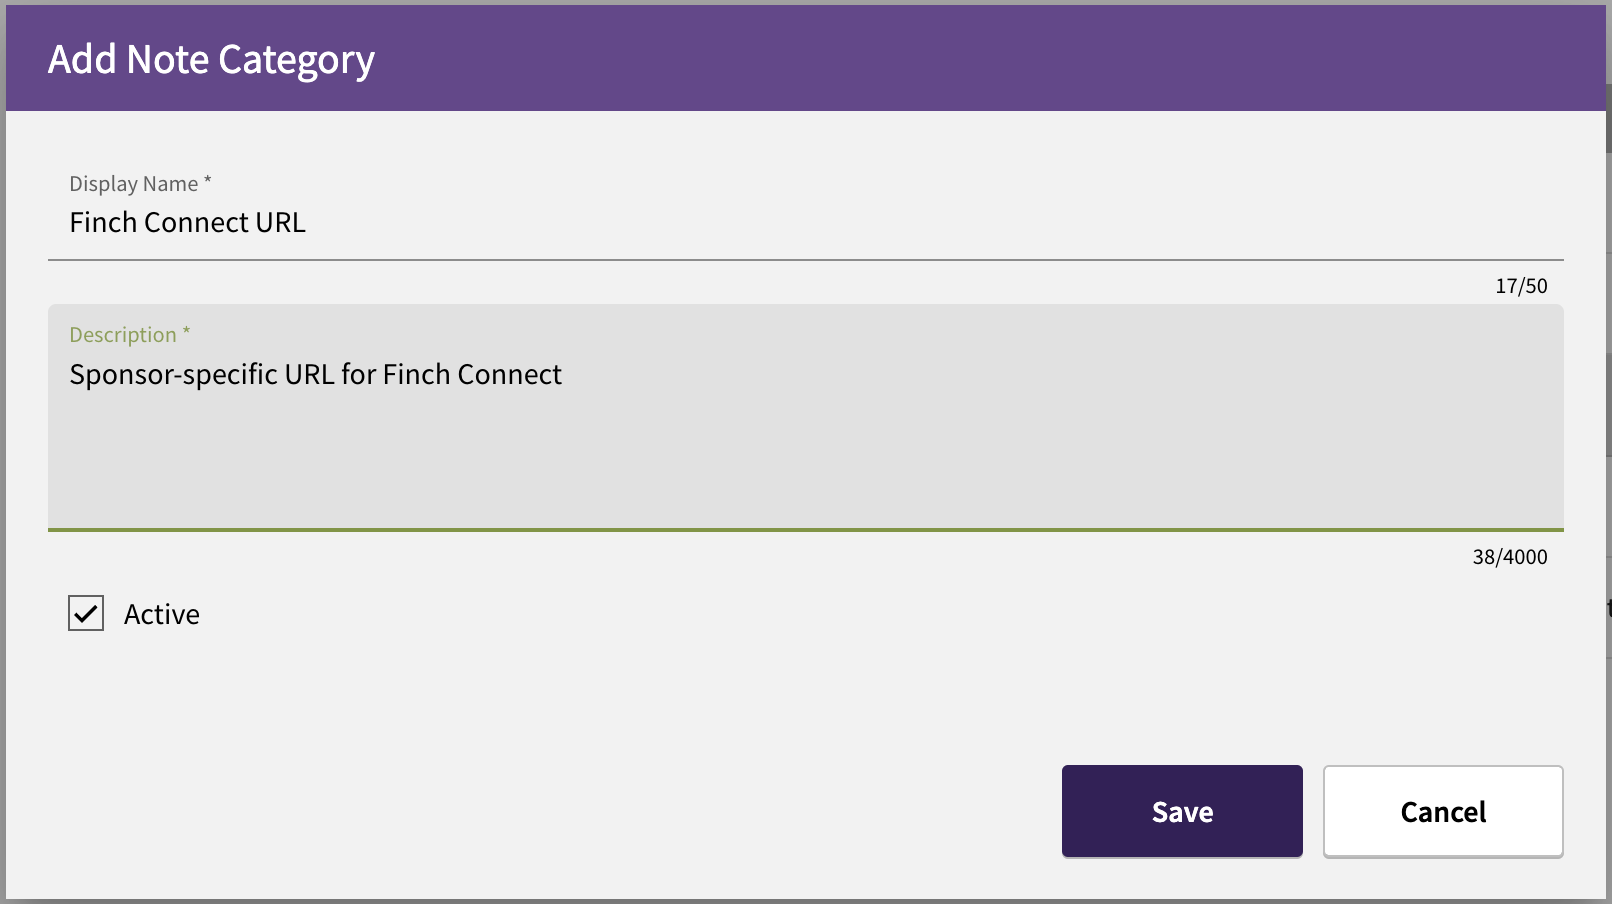
Step 1b: Add a new Note Category with the following details
Display Name: Finch Connect URL
Description: Sponsor-specific URL for Finch Connect
Active: true
Step 2: Export sponsors from PensionPro
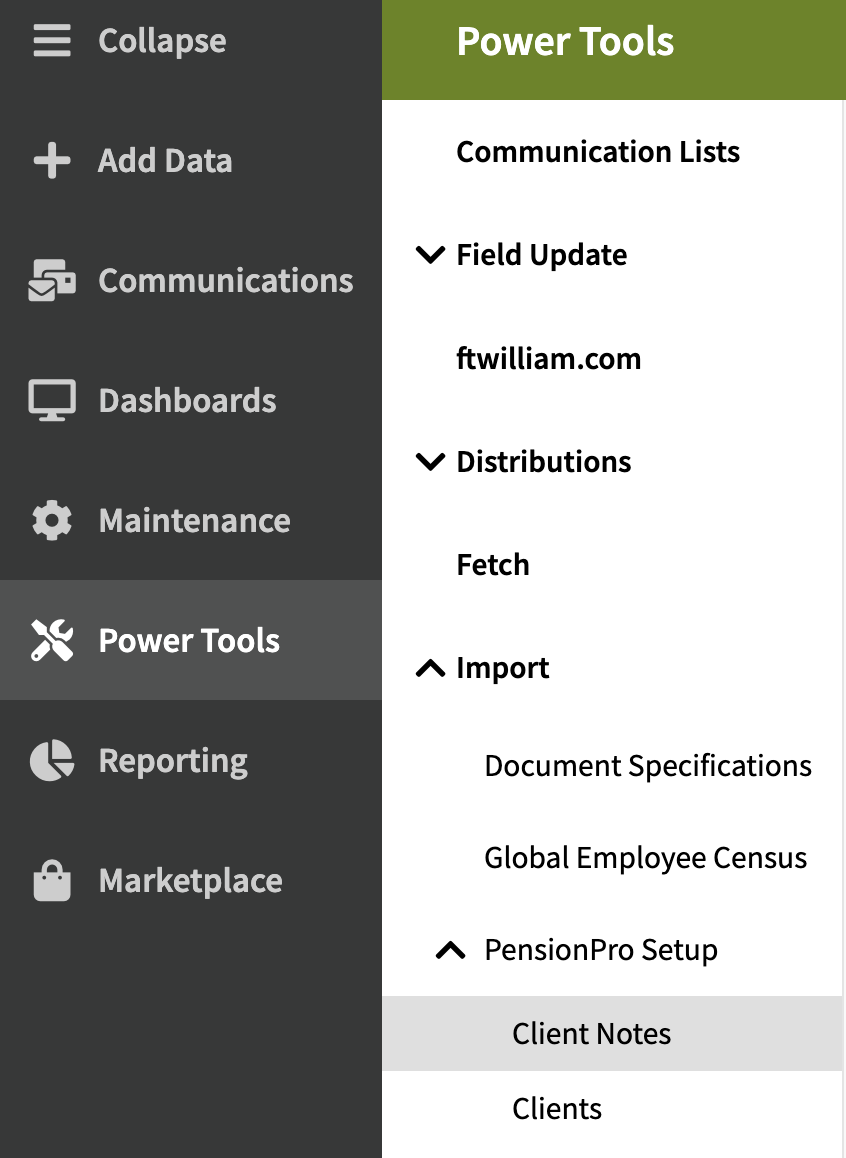
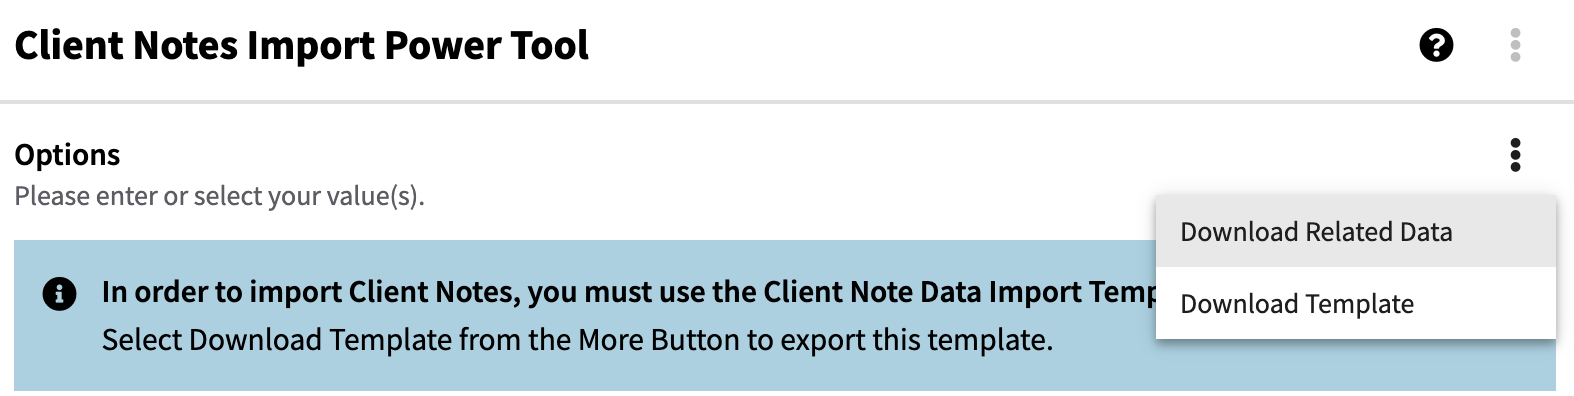
Step 2a: Navigate to the Import Power Tool section
Go to Power Tools -> Import -> Client Notes
Step 2b: Download client list
Download related data through the dropdown in the top right
Step 3: Generate Finch Connect URLs
Refer to the Create Finch Connect Links in Bulk section to export URLs.
Step 4: Upload Connect URLs into PensionPro
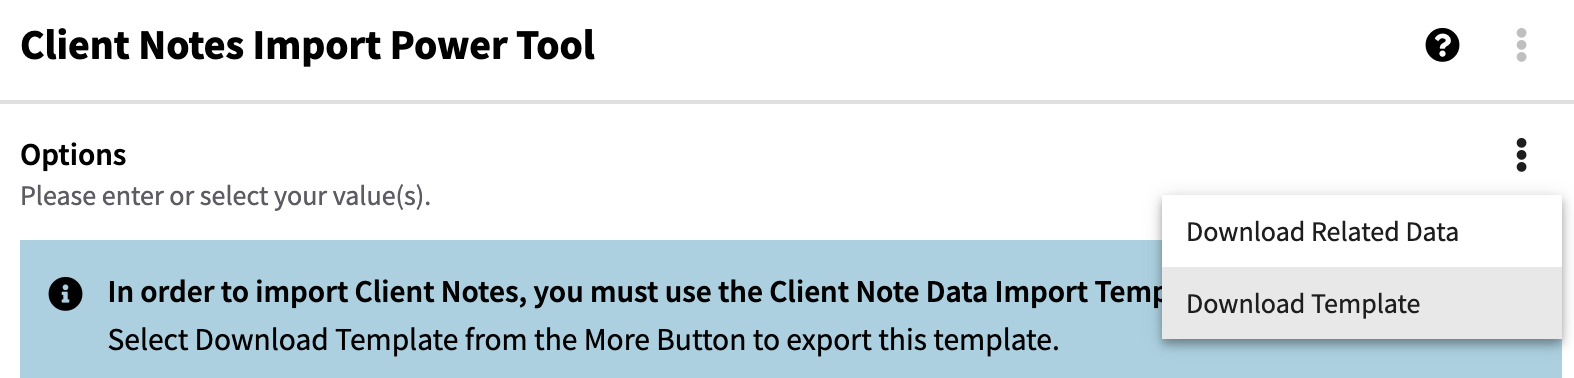
Step 4a: Navigate to Import Power Tool section
Go to Power Tools -> Import -> Client Notes
Step 4b: Download template
PensionPro can only ingest Notes through its Template.
Step 4c: Fill out PensionPro template
Populate the template with the following details.
Client Name: the Customer Name from the Finch export (required)
Client ID: the Customer ID from the Finch export (required)
Note Text: the Finch Connect URL from the Finch export (required)
Note Category: name of the previously-created Note Category ("Finch Connect URL")
Created On Date: current date
Created by Employee Name: name of the person creating the file

Step 4d: Upload the Note Category
Continue with the wizard through the Preview, Review, and Finish steps.
Step 5: Send bulk emails
PensionPro's Blast Email capabilities can be used to send emails en-masse to onboard sponsors.
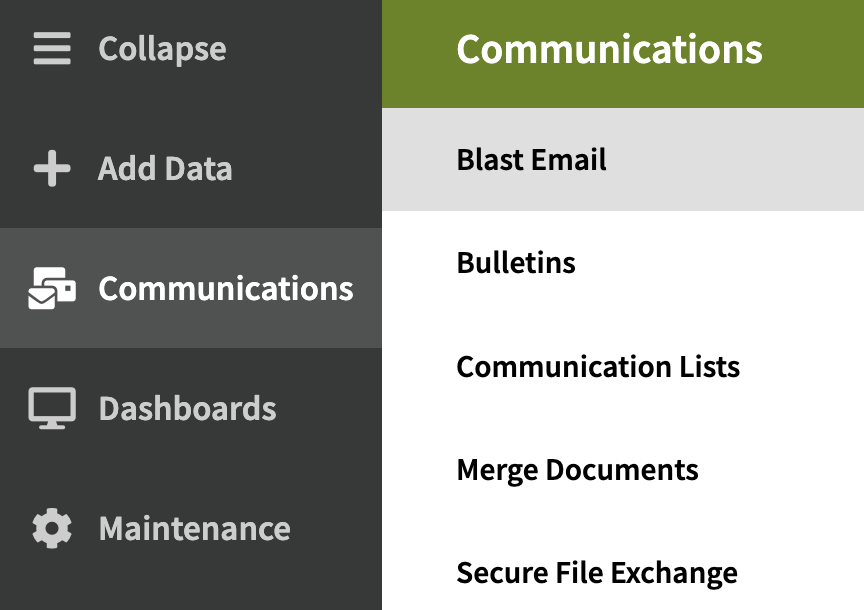
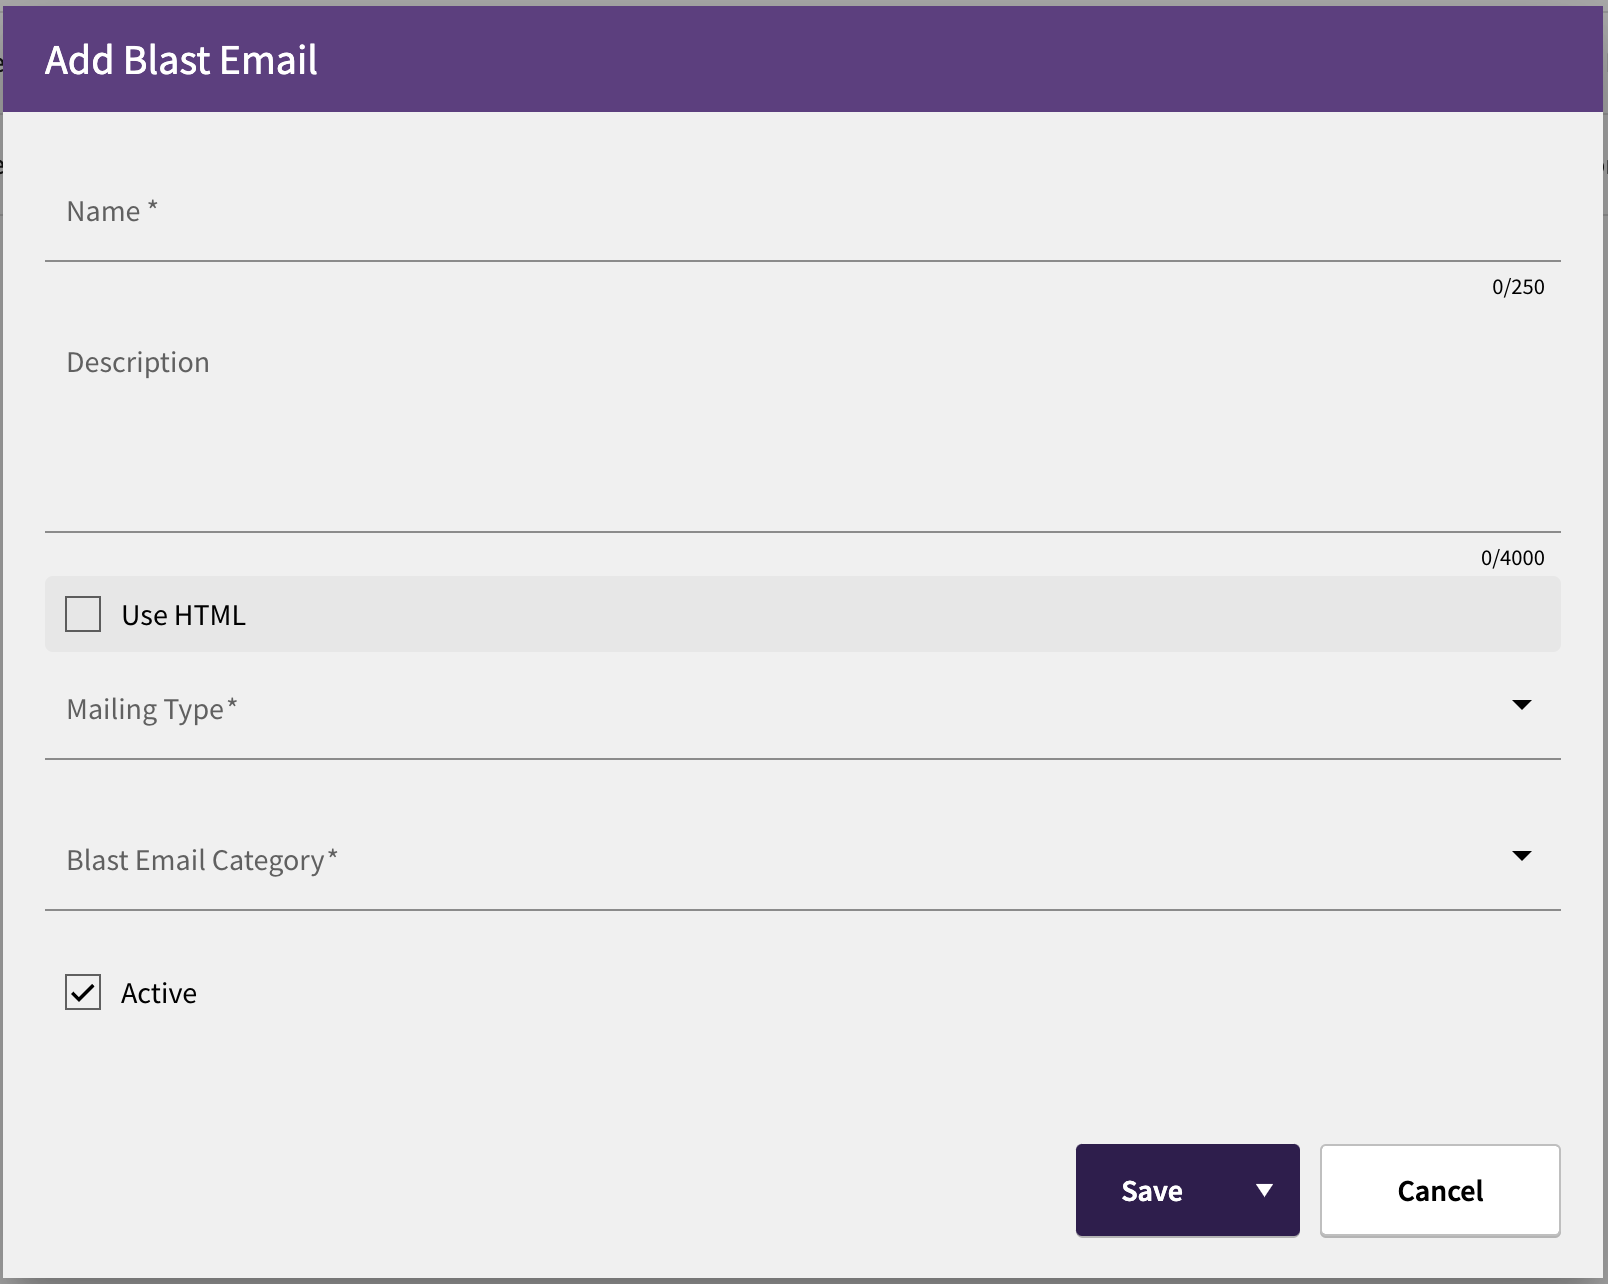
Step 5a: Create a new Blast Email
Go to Communications -> Blast Email and add a new Blast Email. Fill out the details
Example email template
Subject: Connect Your Payroll System for Upcoming Audits
Dear [First Name],
Thank you for joining [TPA] family! We are honored that you chose us to administer your retirement plan, and we're excited to begin working with you. Now, you can connect your payroll system to fetch census and payroll information without needing to export files.
If you use a payroll provider on this list, you can take advantage of this streamlined process:
ADP Run
ADP Workforce Now
Alphastaff
Dayforce (Ceridian)
Insperity
Justworks
Paychex Flex
Paycom
Paycor
Paylocity
Quickbooks Online
Sequoia One
UKG Pro
UKG Ready
Workday
ADP TotalSource (ADP WFN)
ADP Comprehensive Services (ADP WFN)
Patriot
Paytime (SAAS HR)
PayNW (SAAS HR)
Payroll Office of America (SAAS HR)
Prism HR
G&A Partners (Prism HR)
Payroll Solutions (Prism HR)
C2 (Prism HR)
Vfficient (Prism HR)
VensureHR (Prism HR)
Resourcing Edge (Prism HR)
InfinitiHR (Prism HR)
EngagePEO (Prism HR)
QuestCo (Prism HR)
Amplify HR (Prism HR)
Cognos HR (Prism HR)
Creative Business Resources (Prism HR)
EmPower HR (Prism HR)
Sheakley (Prism HR)
Please use the link below to connect your payroll system.
[Client Note Text]
Warm regards,
[Sender signature]
Step 5b: Add Finch Connect URL
In the Filters tab, add a new filter that associated the Client Note Category to be equal to the Finch Connect URL. This filter will add the sponsor's associated Finch Connect URL that was uploaded earlier.

Step 5c: Select Recipients
In the Recipients tab, select who the blast email should go to. Typically, only the Main Contacts receive the email.
Step 5d: Review and Finish
Complete the Review and Finish Blast Email setup steps. Emails will be sent out as soon as the process is complete.