ADP Workforce Now - Add a Standard Practitioner
Last updated: June 9, 2026
To connect your ADP Workforce Now account to this application, you must be a Standard Practitioner and have sufficient permissions to create a new Standard Practitioner user.
Finch Connect Video Walkthrough
Before you start
Before you begin, make sure you are using ADP Workforce Now. If any of the following applies to you, please skip the instructions below.
If you are using ADP Workforce Now Cloud, the following instructions will not apply. Finch does not currently support ADP Workforce Now Cloud. Please reach out to the application requesting access for next steps.
If you are part of the ADP PEO (professional employer organization), you are using ADP TotalSource — please follow these instructions instead.
If you are part of the ADP Comprehensive Services offering please follow these instructions instead.
If you are part of the ADP Administrative Service offering, please contact your ADP account representative to add your application as a 3rd Party Practitioner to your account. Please have them send the 'Add Admin' form to the email address listed in Finch Connect.
Instructions
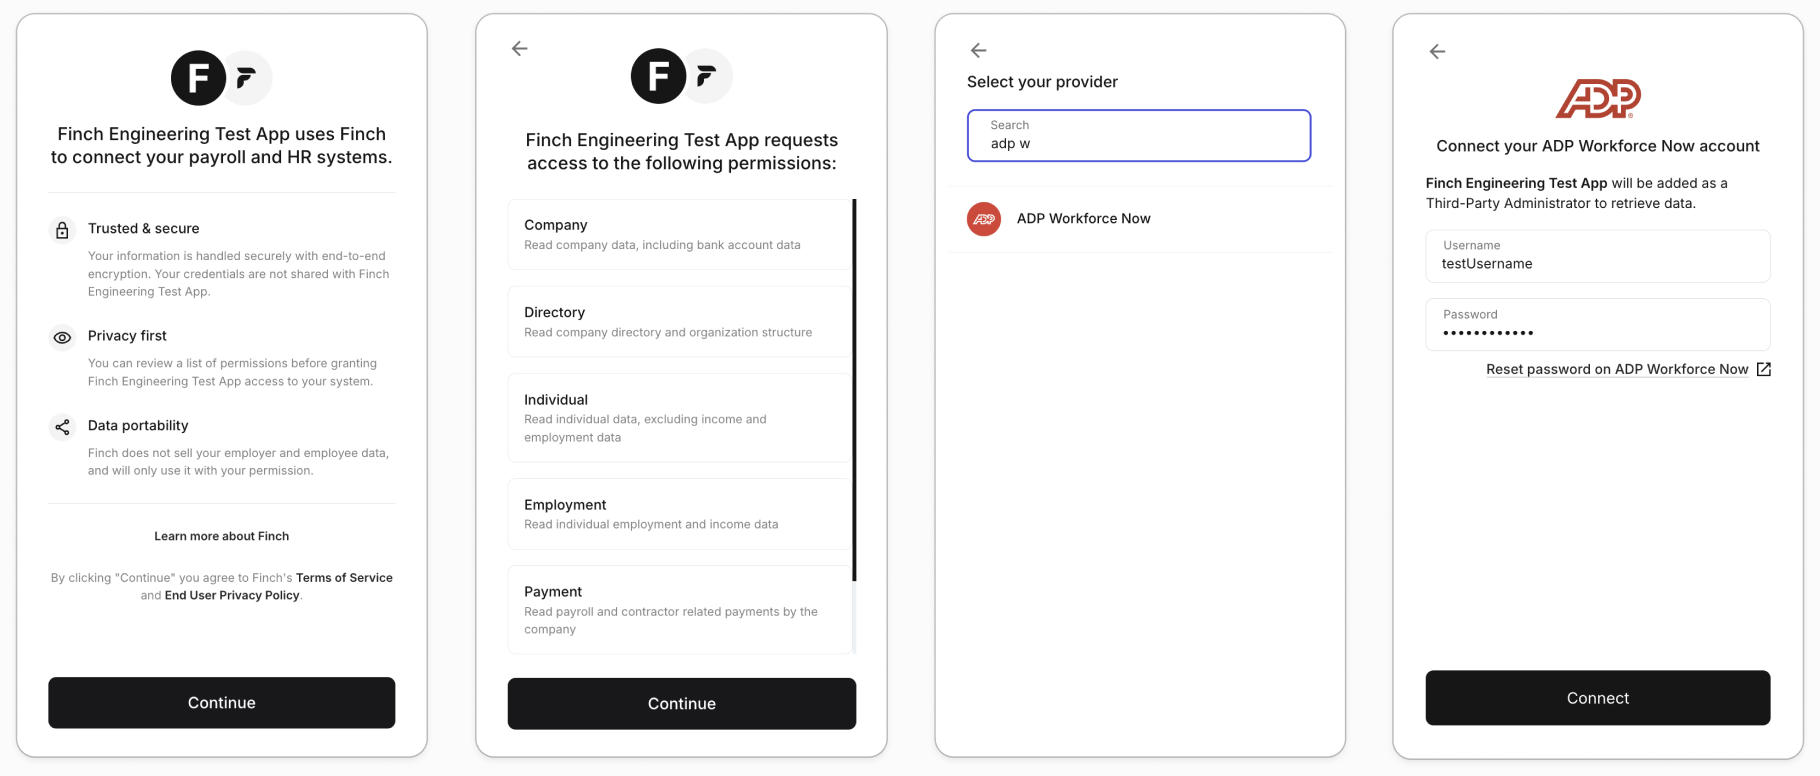
To connect your ADP Workforce Now account through Finch,
Open Finch Connect
Accept the Terms of Service
Read through the requested access
Search for ADP Workforce Now on the Provider Selection screen
Input your username and password
Click Connect
If you receive an error and cannot connect, you will be presented with the option to connect manually. The process of connecting manually is detailed in the sections below.
Instructions
Step 1: Add a Standard Practitioner User
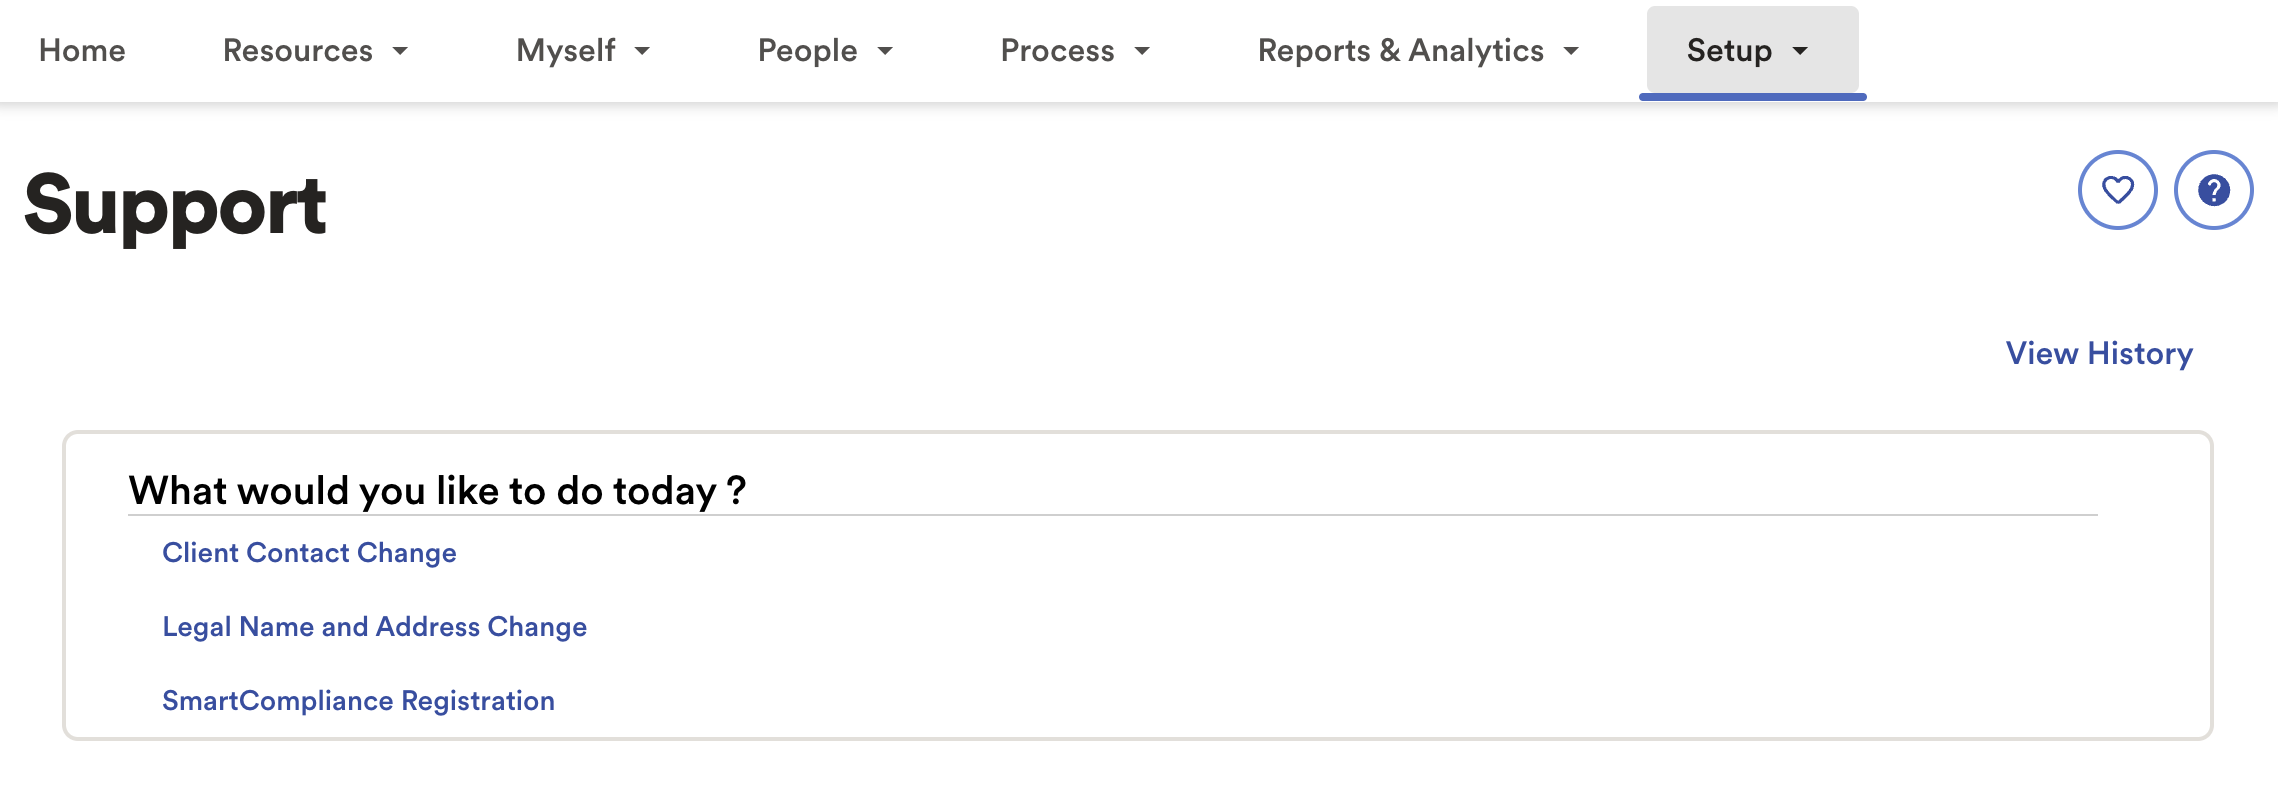
Navigate to Setup > Tools > Support
Click Client Contact Change
Click the Add New Contact tile
Select No to indicate the contact is not a registered employee or an independent contractor for your organization. Enter the requested information:
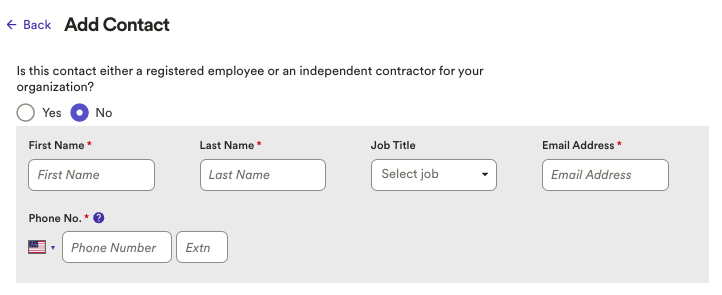
First Name — Use the name provided in the Finch Connect screen
Last Name — Support
E-mail Address — Use the email provided in the Finch Connect screen
Phone Number — 9177173974
Scroll down to Access Settings. Select No, let me choose the options manually to begin selecting settings:
Select Companies — Select all company codes you’d like to give access to.
Administrator Access — Select Product User from the dropdown menu.

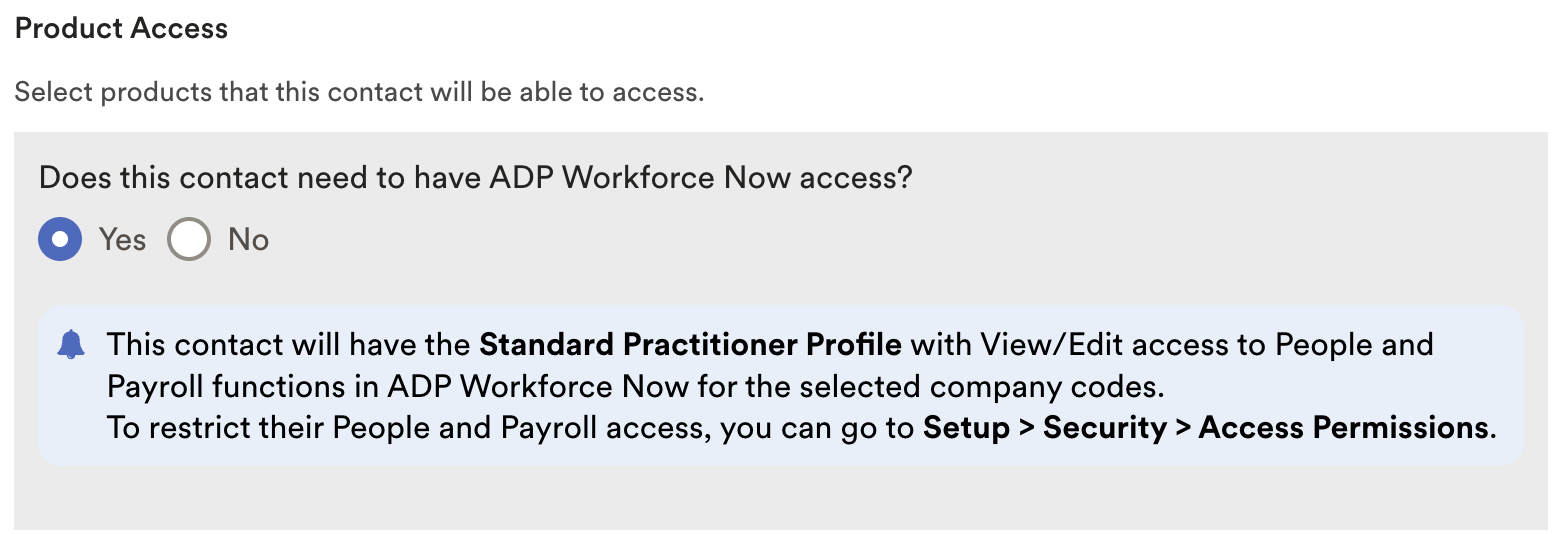
Product Access — Select Yes for Workforce Now access
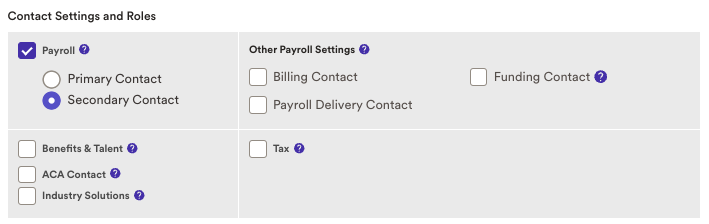
Contact Settings & Roles — Select Payroll and ensure that Secondary Contact is marked.
Click Submit.
As a result, the user has been added as an authorized contact and will receive a welcome email and user credentials.
Step 2: Assign this user the required access to sync data securely
Employee access
The steps above should automatically grant the user Standard Practitioner access. This user type is required to service this integration successfully. You can tailor this Standard Practitioner user's permissions based on your needs by following the steps below:
Navigate to Setup > Security > Access Permissions > Manage People.
Search for the contact you just set up and select their profile.
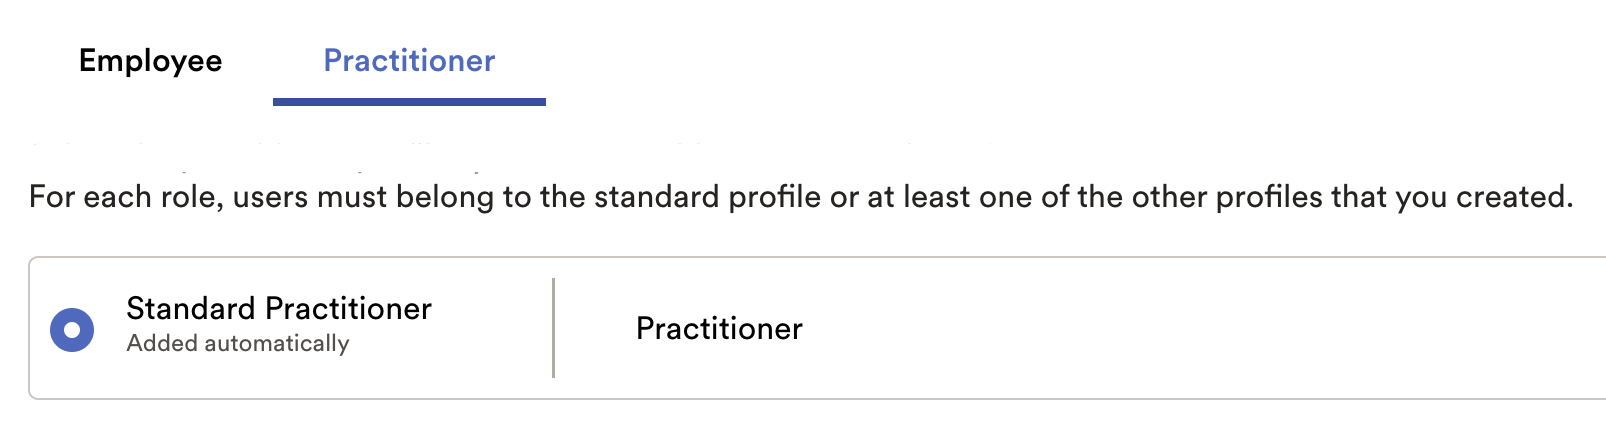
Click Manage Profile Memberships.
Ensure the user is assigned the Standard Practitioner role.
Click Save.
If your team uses this application to sync Organization data only
Navigate to the People Access tab and ensure the user is granted View Only Access to all People
Navigate to the Payroll Processing Access tab and ensure the user is granted No Access
If your team uses this application to sync Organization and Payroll data
Navigate to the People Access tab and ensure the user is granted View Only Access to all People
Navigate to the Payroll Processing Access tab and ensure the user is granted View Only Access
If your team uses this application to update deductions and contributions
Navigate to the People Access tab and ensure the user is granted View and Edit Access to all People
Navigate to the Payroll Processing Access tab and ensure the user is granted View Only Access
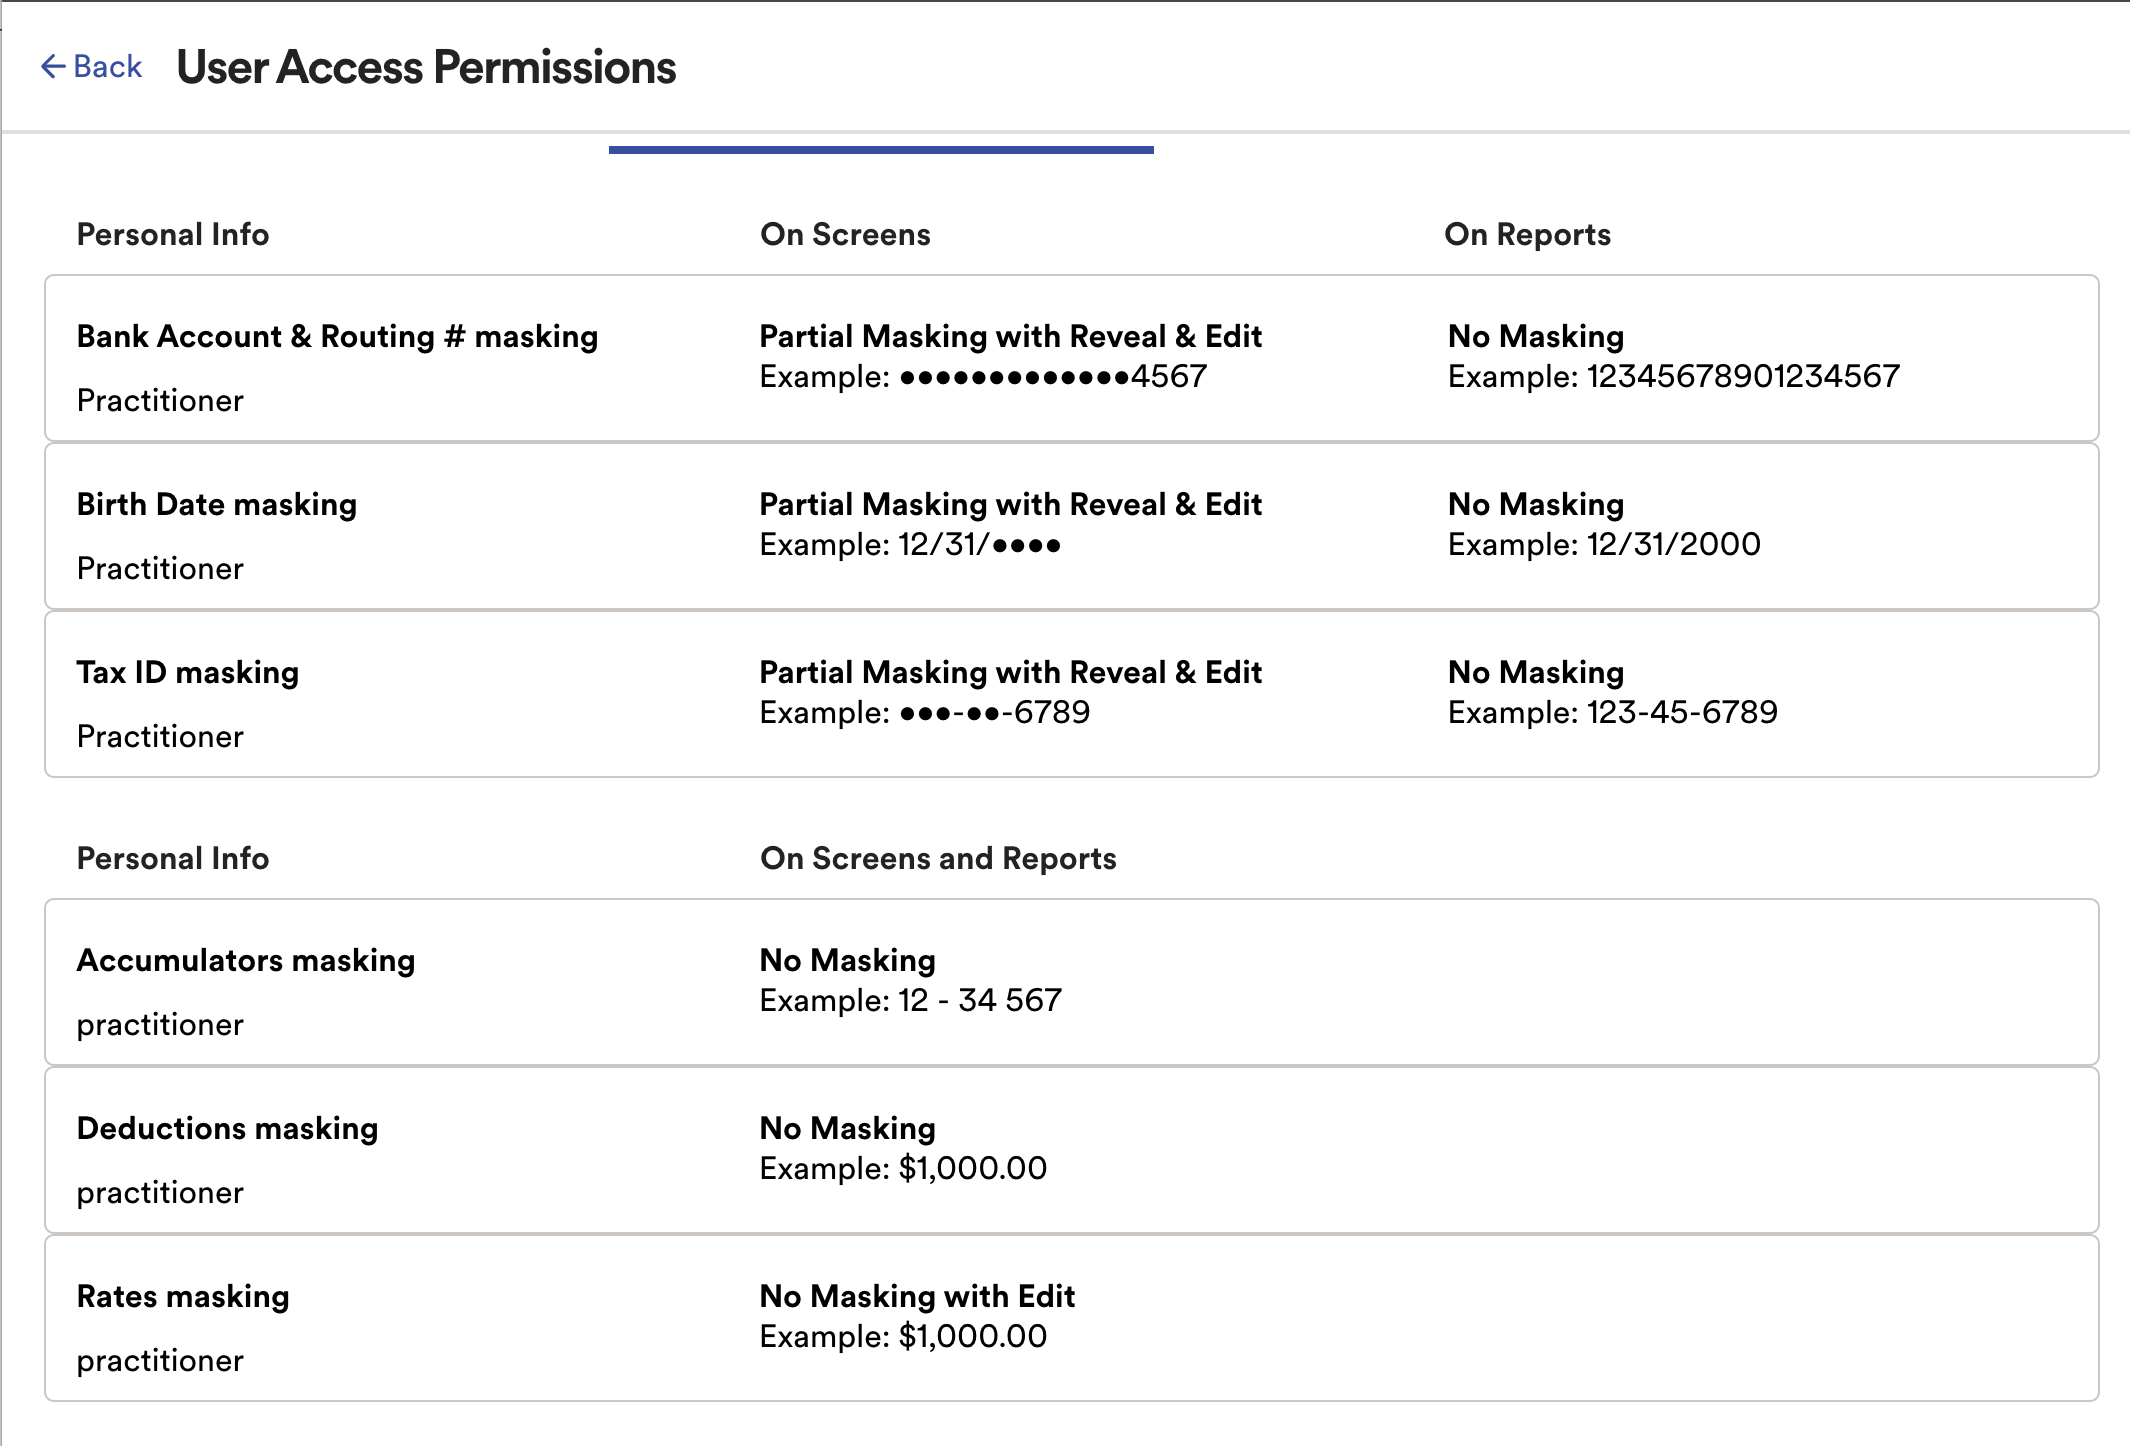
Sensitive personal information
In some instances, certain fields will be masked by default. Please ensure the Standard Practitioner role has Full Masking disabled for Birth Dates and Tax IDs if you require this data. Please verify that the Standard Practitioner profile has been set up correctly by following the steps below:
Navigate to Setup > Security > Access Permissions > Manage Profiles
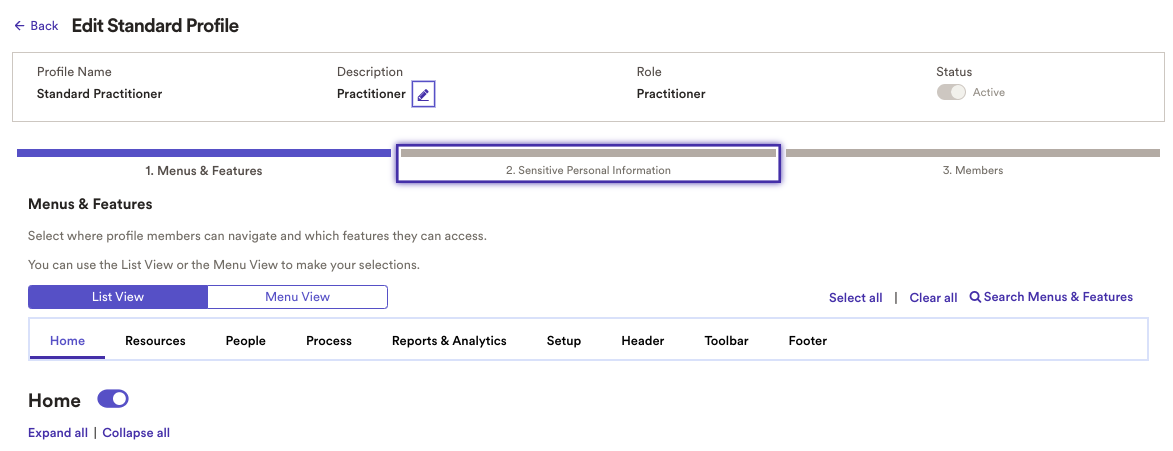
Click Standard Practitioner
In the top menu bar, select 2. Sensitive Personal Information
Under Birth Date masking > On Screens, update the selection in the drop-down menu to Partial Masking with Reveal and Edit. Set On Reports to No Masking.
Under Tax ID masking > On Screens, update the selection in the drop-down menu to Partial Masking with Reveal and Edit. Set On Reports to No Masking.
Click Save
Permissions Troubleshooting:
Below you'll find additional steps and screenshots to verify that all permissions have been granted:
In the Setup menu, navigate to the Security section and open the link for Access Permissions.
Find the box for Individual Permissions and click the Manage People button.
Find the User that needs to be updated by either scrolling down the list of names or by using the search bar in the upper right of the list. Select the user by clicking on their blue, underlined name.
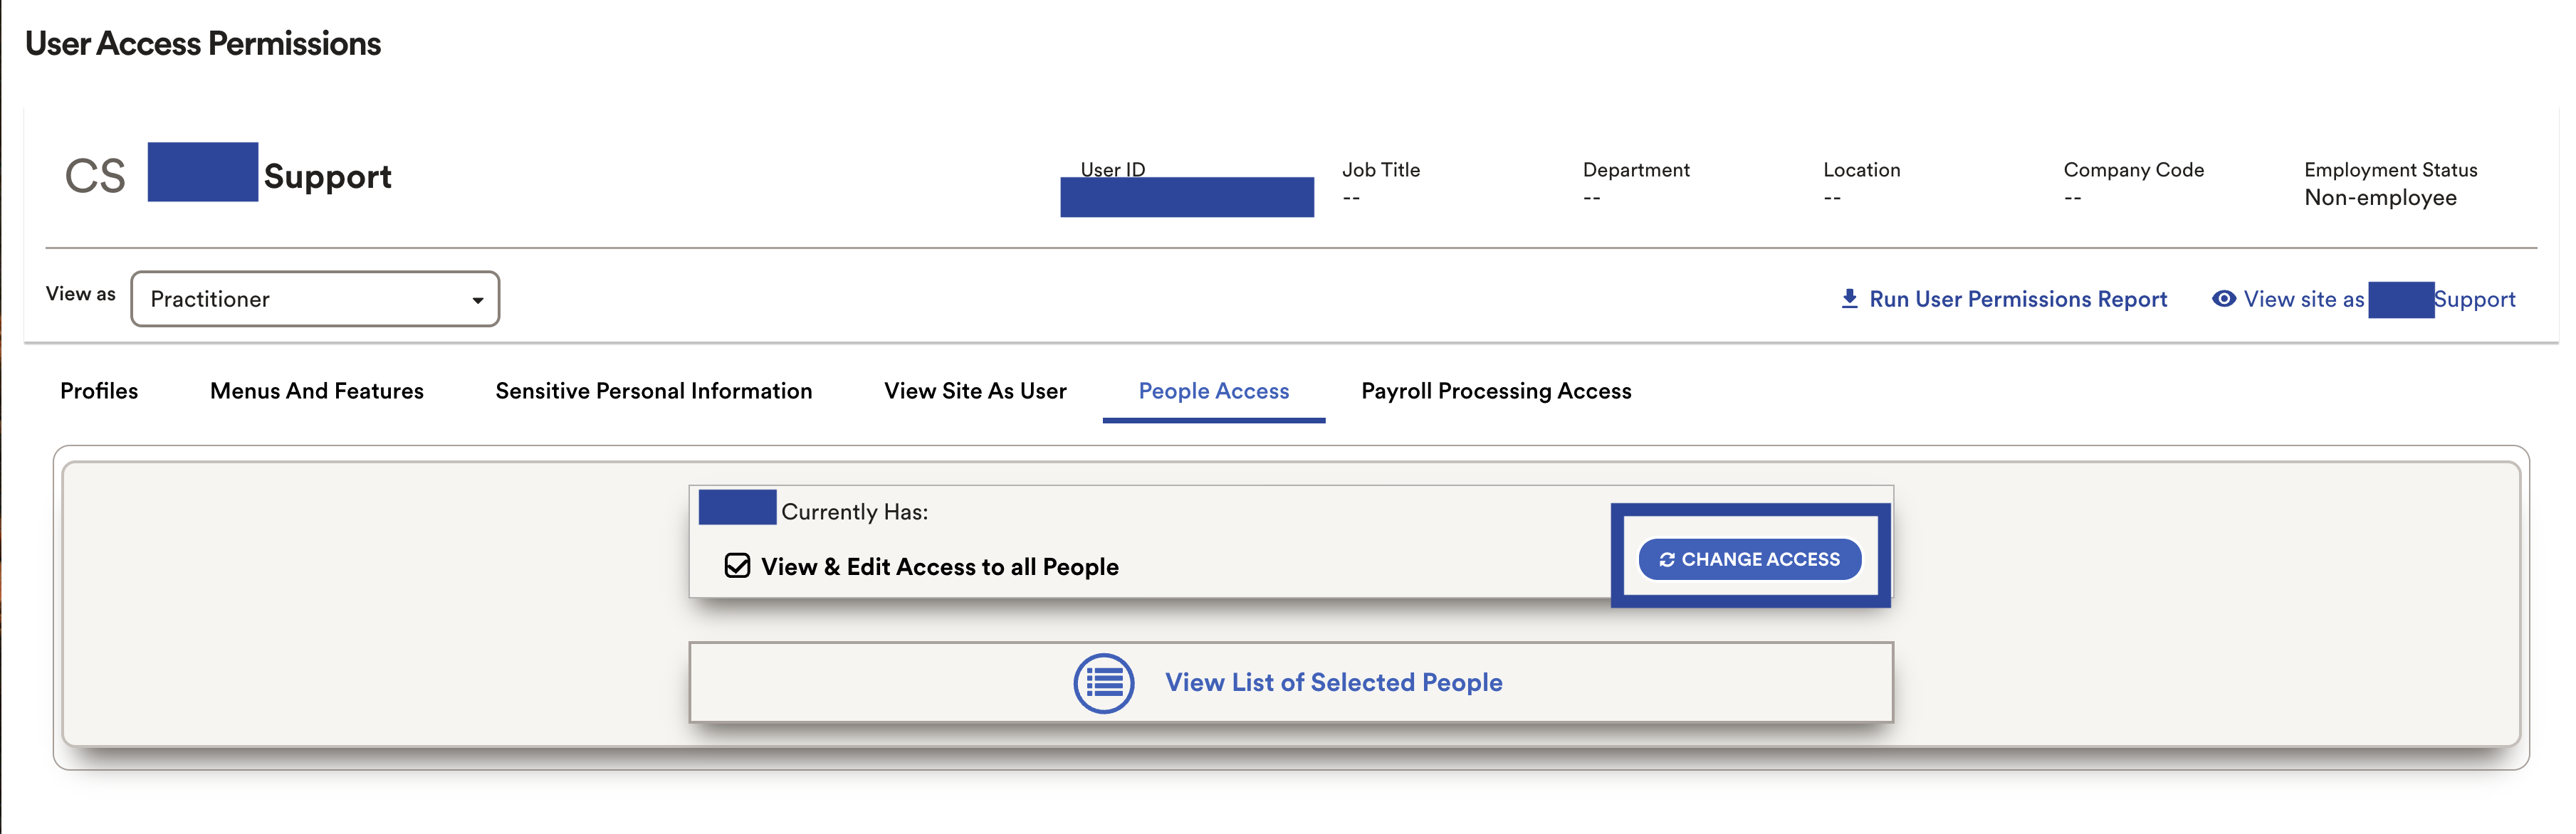
On the User Access Permissions screen, select the People Access tab. This will display the current access that the user has to People related permissions.
The user should have View Access to all People. If the Benefits or Deductions will be part of the connection scope, the user will also need Edit Access.
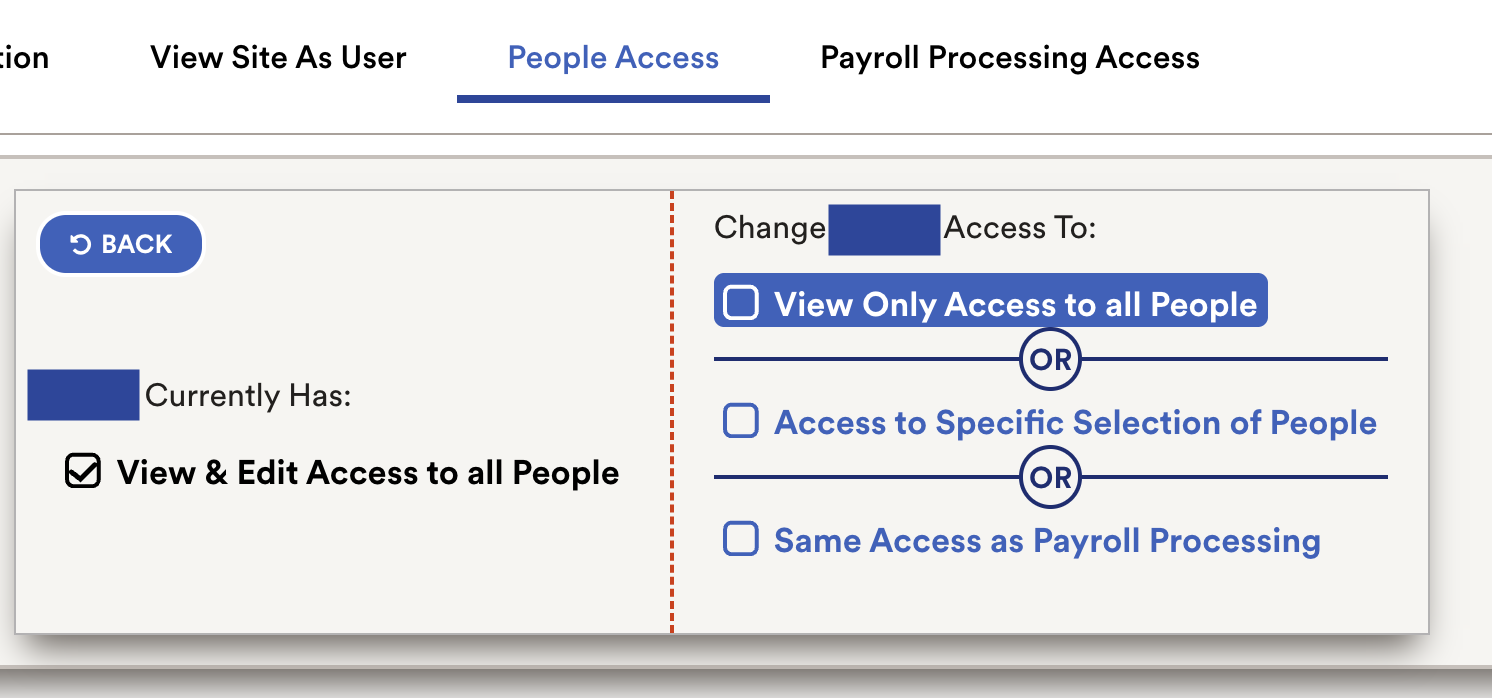
To change the level of access available, click the blue change access button. A list of options will open and access levels can be selected.
The screenshot below lists all PII that can be masked or partially masked: