API Explorer
Last updated: December 22, 2025
The API Explorer lets you make Finch API requests directly from the Dashboard. Use it to validate requests, inspect responses, and troubleshoot integrations without switching to an external tool like cURL or Postman.
When to use API Explorer
Use API Explorer to:
Test an endpoint quickly and confirm expected request/response shapes
Reproduce and debug customer issues (for example, unexpected fields or missing data)
Validate parameters before implementing the request in your application
Access & permissions
API Explorer access and write capabilities depend on your Dashboard role.
See details of API Explorer access for Members, Editors, and Admins here.
How to access API Explorer
In the Finch Dashboard, open Connections.
Click into a specific connection.
Select the API Explorer tab.
Make a request
Select the endpoint you want to call from the left navigation.
Provide any required query parameters and/or request body.
Click Send.
Review the Response panel for status code, headers, and body.
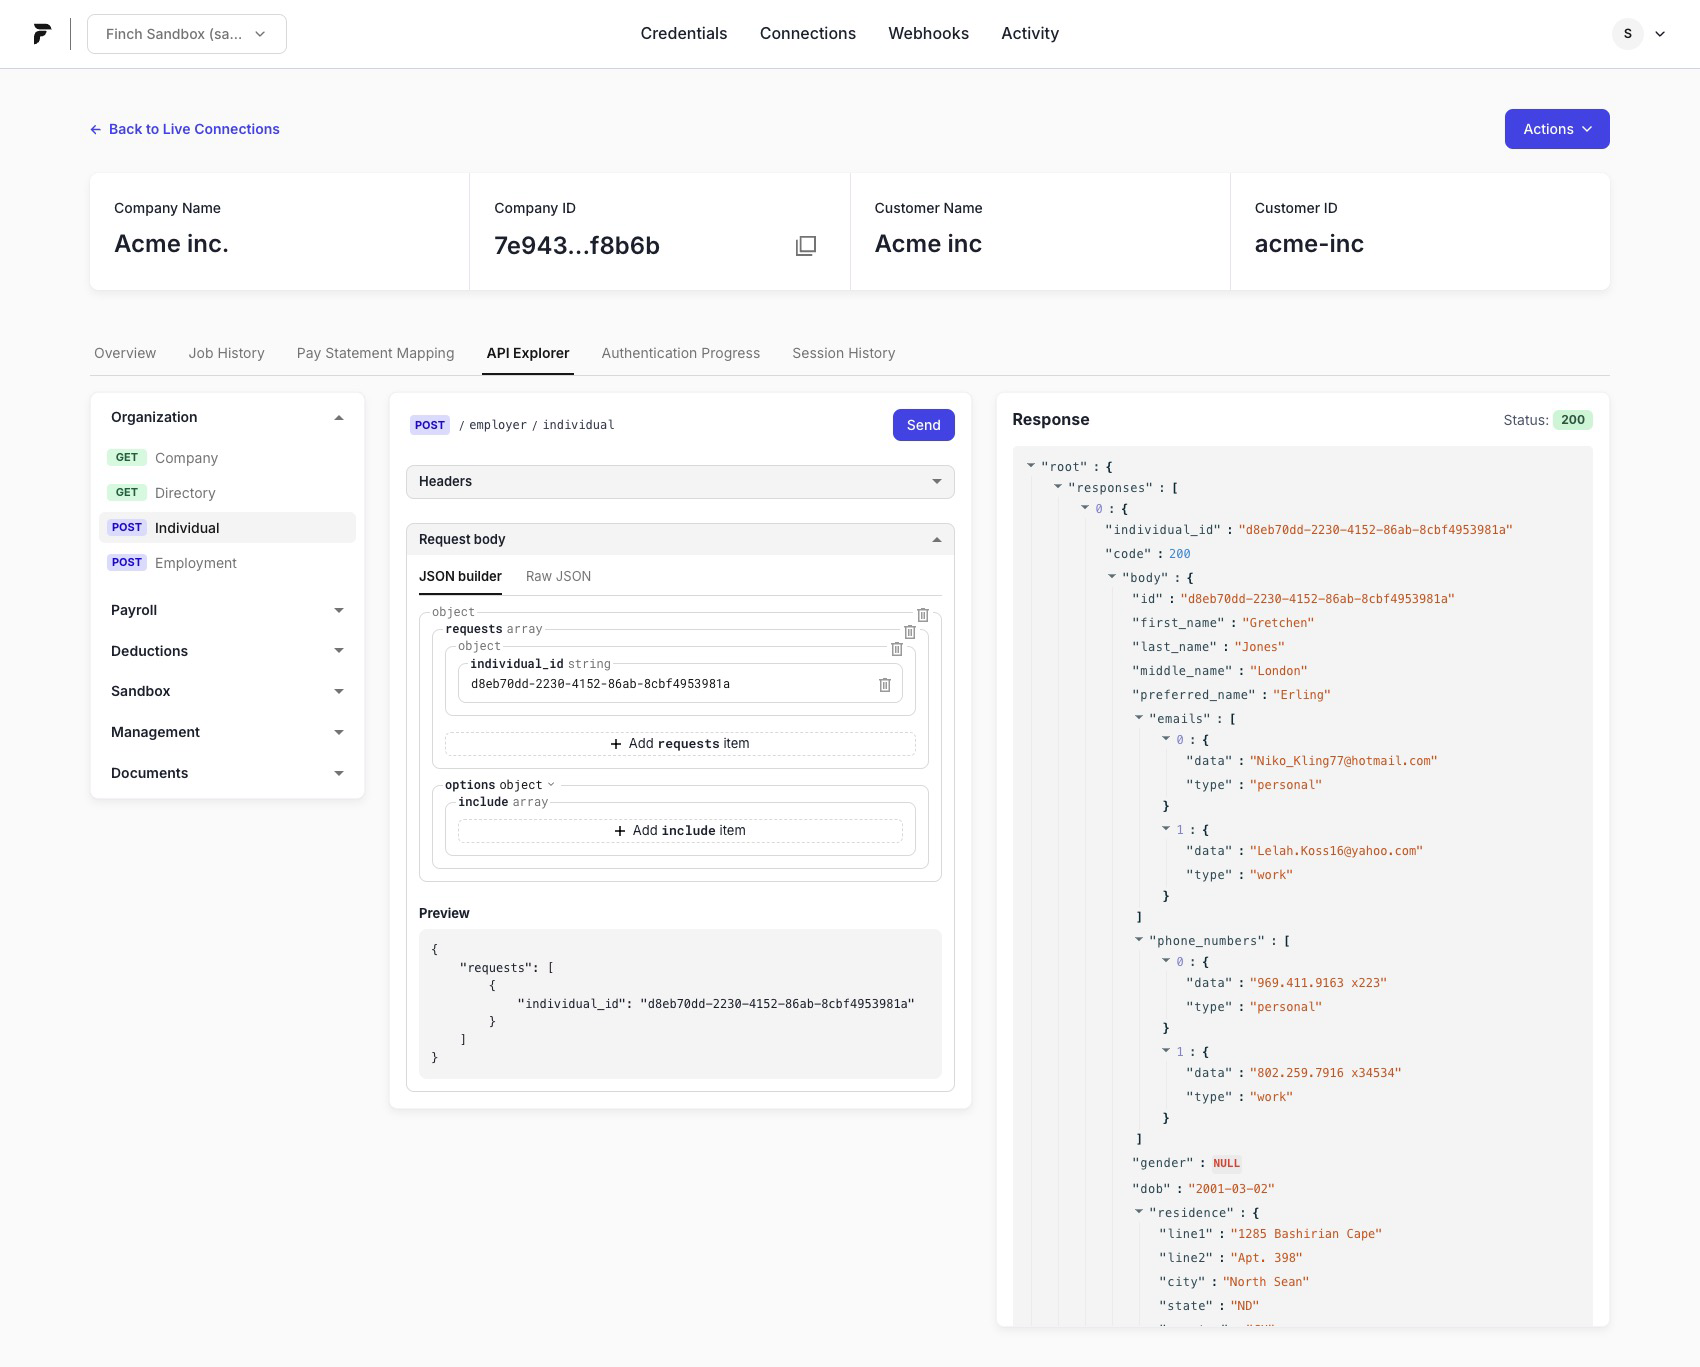
Build request bodies with the JSON builder
For endpoints that accept a JSON body, the API Explorer provides a form-based builder to help you construct valid requests.
Depending on the endpoint, the builder may:
Enforce field types (string, number, boolean)
Provide dropdowns for enumerated values
Support nested objects and arrays
Surface validation errors before you send the request
Read the response
After you send a request, the Response panel shows:
Status code
Response headers
Response body (JSON)
If a request fails, the response body will include an error type and message you can use for debugging.
Entity selector
If your connection supports multiple entities, you must select the entity you want to query before sending a request.
Because Finch APIs operate at the entity level, API Explorer executes requests for the selected entity only. Before clicking Send, choose the correct entity in the Entity selector.

Related: 📄 Product Migration Guide: Multi-Entity Mode
Tips for troubleshooting
Confirm you’re in the right connection: API Explorer runs requests in the context of the connection you’re viewing.
Select the right entity (multi-entity): A request can succeed for one entity and fail for another depending on configuration and data availability.
Use the Activity tab: If your team audits requests or needs a record of what was sent, check the Dashboard Activity view for request history (if available for your role).