Create & View Your Connections
Last updated: December 23, 2025
The Connections page is where you can find information on each connected employer, generate new Finch Connect links, and export connection data.

Actions
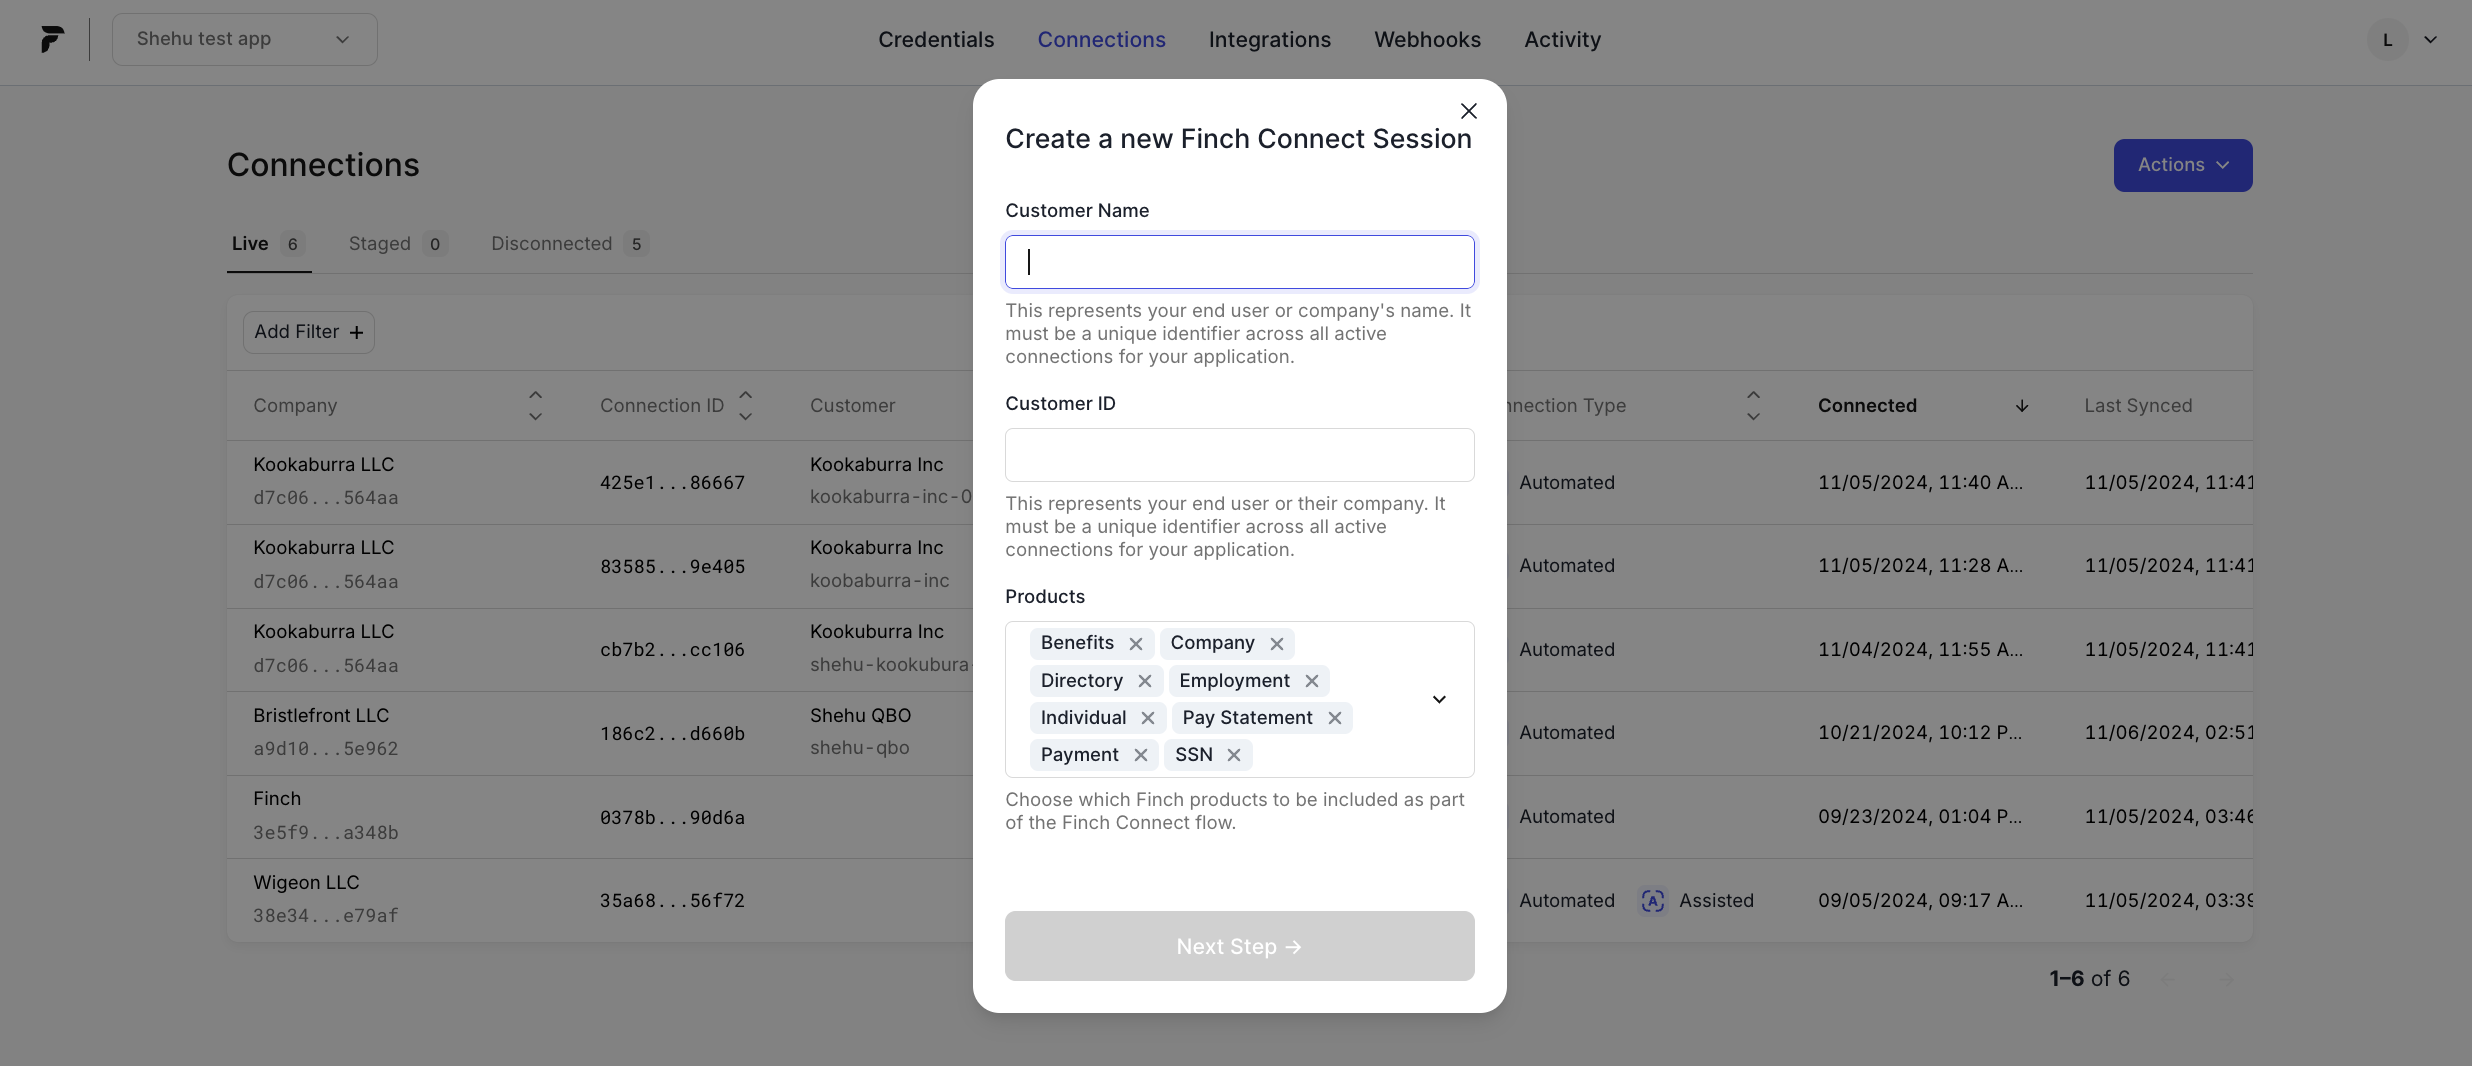
Create a new Finch Connect link
To create a new connection, first generate an invitation link:
Go to the Connections page.
Open Actions.
Select Create a New Connect Link.

You’ll be guided through a modal to create a unique, unchangeable Finch Connect URL for the employer. The fields in this modal mirror the body of the POST /connect/sessions API request.
Once you've created a Finch Connect link, share it with the employer to authenticate. You can monitor their progress under 📄 Authentication Progress.
Note: This process is only applicable for the redirect method and you must specify a redirect URL on the second screen of the modal.
Download a CSV of your Connections
From Actions, you can export your connections as a CSV. This can help streamline connection management across internal teams without requiring Dashboard access. You must select the type of connection you want to download a CSV file for (i.e.: Live, Staged, or Disconnected).
View, Sort, and Filter
View by Live, Staged, or Disconnected
Connections can be in one of three states: Live, Staged, or Disconnected.

Live
The employer has completed the Finch Connect flow. These connections have a connection_id and an access token that will be used to sync data.
If there are errors or re-authentication is needed, it will be reflected in the connection status. Connections in a re-auth state are still considered Live.
Staged
A Finch Connect session is active, but a connection has not yet been established. The employer has not completed Finch Connect, and these sessions do not have a connection_id or an access token.
Disconnected
The connection is no longer active, and the access token(s) associated with the connection are no longer usable.
Sort Connections
You can sort the Connections table by name or ID to find employers more quickly. Click a column header to sort.
Filter by Connection Attributes
You can filter by any of the attributes displayed on the page. To create a filter, select Add Filter and pick from the dropdown.
Columns
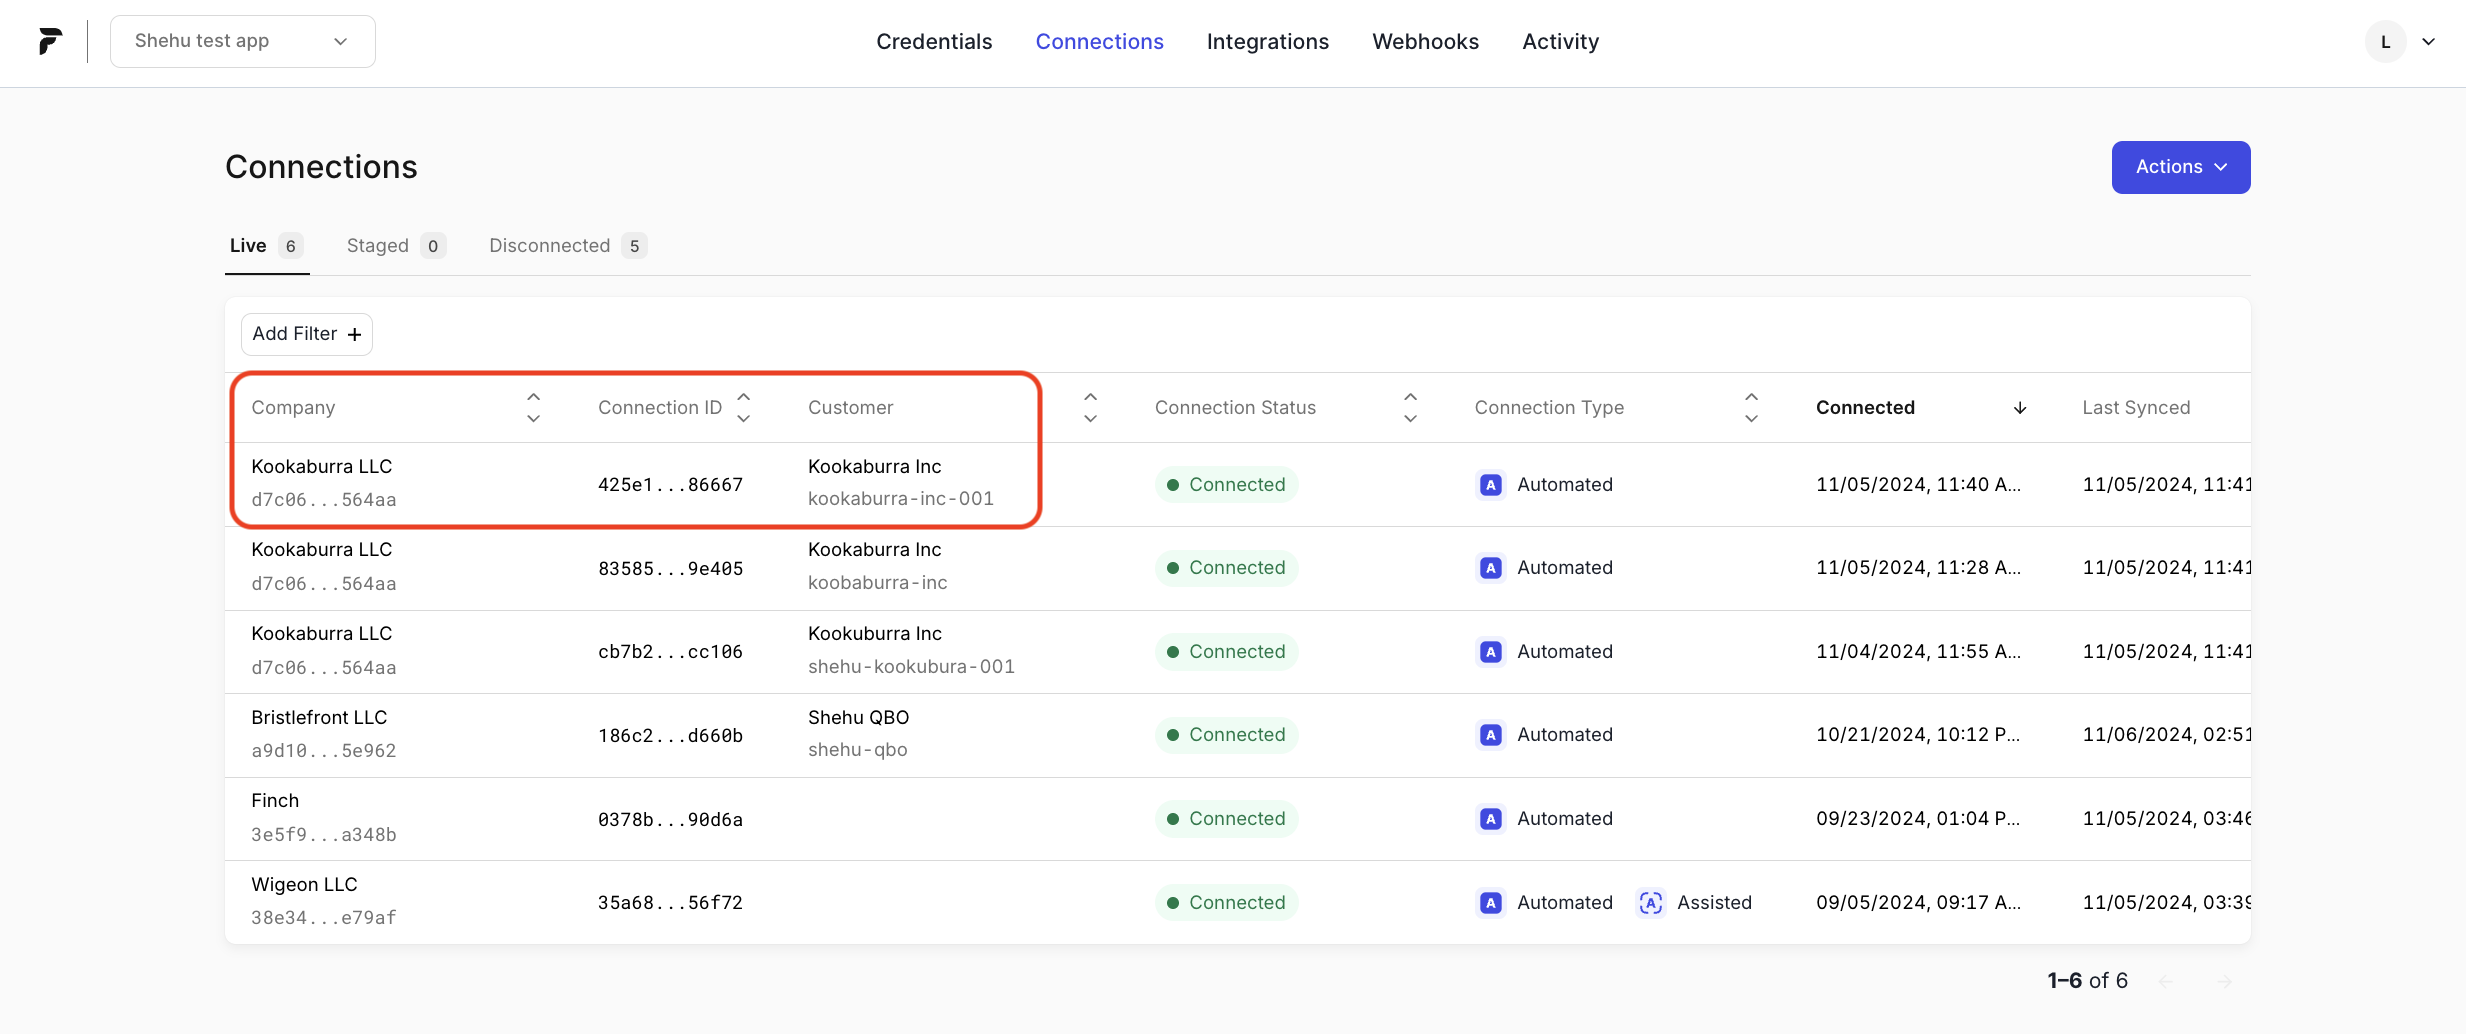
Company
This column includes two identifiers from the underlying provider:
Company Name: Pulled from the underlying payroll system. This may not match the name you use internally (for example, legal name vs. DBA).
Company ID: A Finch-generated UUID constructed using an ID from the underlying payroll system.
If a connection includes multiple entities, the Company column may display “Multi-entity connection”, since the connection can include multiple company names and company IDs. For this reason, we recommend using the Customer column instead for searching and filtering.
Connection ID
A unique identifier created when an employer successfully authenticates. This is different from the Company ID.
Customer
Information your team defines when creating a Finch Connect session:
Customer Name: Displayed on the first line.
Customer ID: Displayed on the second line.
These values remain consistent regardless of how many entities are included in the connection.
Customer Name and Customer ID may be blank for legacy connections created prior to the session_id release.
# Entities
How many entities are included in the connection.
Single-entity connections show
1Multi-entity connections show the total number of connected entities
To opt in to multi-entity mode, see 📄 Product Migration Guide: Multi-Entity Mode
Connection Status
The current state of the connection (for example, Connected or Re-auth).
If action is needed, you will see a banner at the top of the page. Select View Now to jump to the relevant connections.
Last Synced
When the most recent job completed. This may display a relative time (for example, “2 hours ago”). If no sync has completed yet, this field may be blank.
Connection Type
How Finch syncs data for this connection:
Automated: Data syncs are automatic (24-hour refresh) and deductions are automatic (if applicable).
Assisted: Data syncs are assisted (7-day refresh) and deductions are assisted (if applicable).
Automated, Assisted: Data syncs are automatic and deductions are assisted.
Connected
The date and time the connection was created.
Provider
The HRIS or payroll provider the employer connected to.