Invite Sponsors to Finch Connect
Last updated: December 16, 2025
You can invite plan sponsors to connect their payroll systems by generating a Finch Connect invitation link.
This guide shows how to create invitations one at a time, or in bulk.
Create a Single Invitation Link
Use single links to invite one plan sponsor at a time.
In your Finch Dashboard, go to the Connections page.
Click Actions → Create a new Connect link
Enter plan sponsor details
Customer Name: An internal label for tracking. Does not need to match the payroll system.
Customer ID: An internal ID for tracking. This can contain letters or numbers and must be unique to each connection.
Products: No need to update. This will be configured automatically.

Click Next Step
Enable Show Assisted Providers - if assisted providers are supported for the integration product you are using, this will allow them to be listed in Finch Connect if they are enabled on your dashboard. Note that currently no assisted providers are supported for Relius so this toggle will not impact the list in Finch Connect.
Configure other optional fields if desired, but for TPAs and recordkeepers we recommend you leave them blank.
Click Generate Link
Copy the link by clicking the copy icon
Once you click complete, the connection will appear under Staged on the Connections page
Send invitation link to sponsor by email
You can see what step the sponsor is on in Finch Connect by clicking into the Staged connection and selecting Authentication Progress
Once authentication is completed, the connection will flip to Live
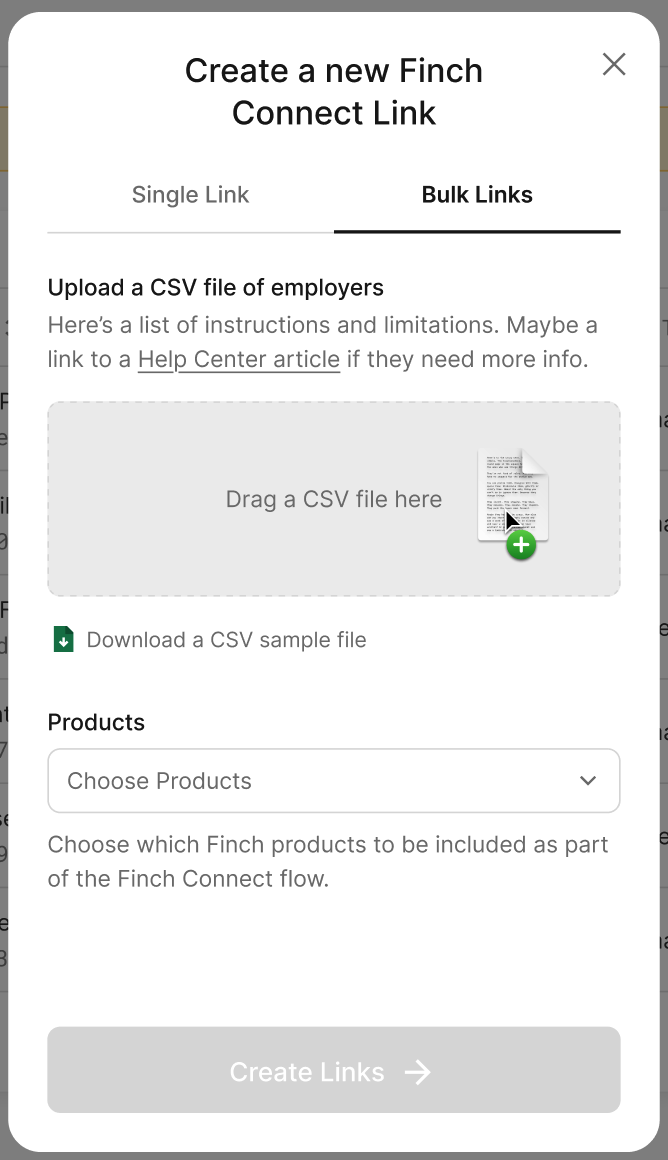
Create Invitation Links in Bulk - PensionPro Only
Use bulk links when you need to invite multiple plan sponsors at once.
In your Finch Dashboard, go to the Connections page.
Click Actions → Create a new Connect link
Select the Bulk Links tab
Upload a CSV file with the following columns:
Customer Name (required)
Customer ID (required, unique)
Customer Email (optional)
Note: One file can contain a maximum of 500 employers, and there can be no duplicate Customer IDs within the file.
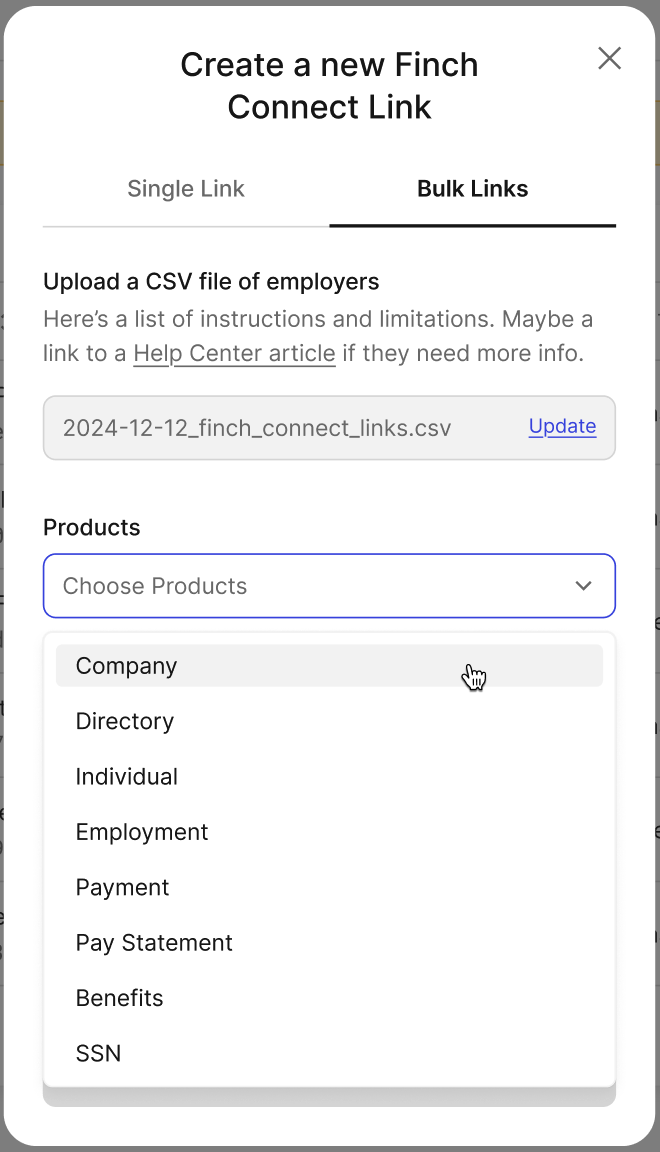
If sending files to PensionPro, make sure to select the following Products: Company, Directory, Individual, Employment, Payment, Pay Statement, and
SSN.
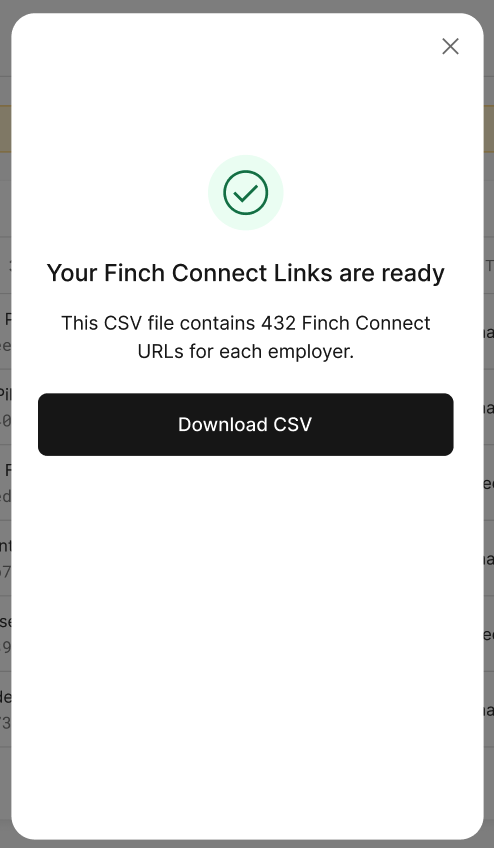
Download the CSV
The CSV file will contain 3 columns: Customer Name, Customer ID, and Finch Connect URL.
Once downloaded, you can close the modal. If you close the modal without downloading the file, the process will need to be repeated.
Tips
Always use unique Customer IDs.
Keep Show Assisted Providers enabled for best coverage.
Links you've created will appear as Staged until the sponsor completes authentication
Links expire after 90 days. You can "refresh" a link to extend the expiration another 90 from the dashboard. Note - the connection will not expire after 90 days, only the Finch Connect link.
Troubleshooting
The link won't open
Ask the sponsor to try a different browser or clear their cache.
Sponsor can’t find their provider
Make sure Show Assisted Providers was enabled when the link was created.
Still stuck?
Send us the Session ID for help. To find the session ID
Click into the connection and select Session History.
Select the most recent session.
Copy the Session ID
Send it to developers@tryfinch.com with your question.
