Miter - Connect your account
Last updated: September 10, 2026
Overview
Connecting your Miter account to Finch requires generating an API Token inside Miter and pasting it into Finch Connect. This gives Finch permission to pull payroll, employment, and directory data from your Miter workspace.
Before you start
You need a Super Admin account in Miter (only Super Admins can create API tokens).
Keep the Finch Connect window open in a separate tab so you can paste the token back in.
Steps
1. Select Miter from the list of providers in Finch Connect
2. Start the Miter connection in Finch Connect
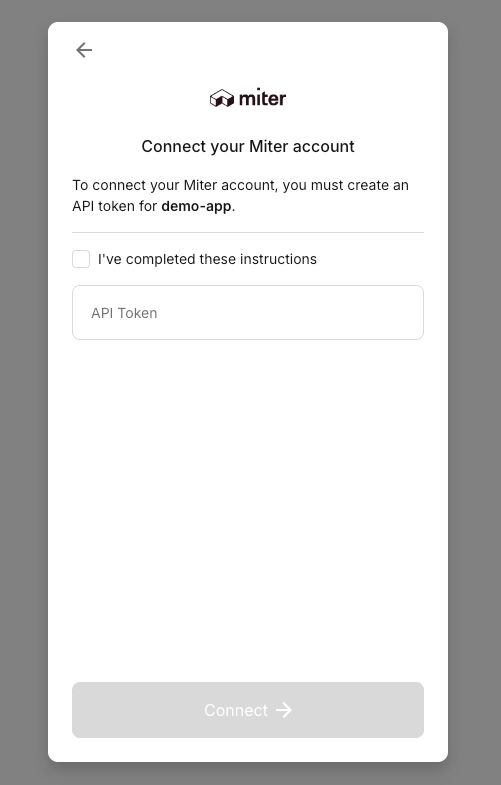
When Finch Connect prompts you to link Miter, you'll see the following screen asking for your API Token. Leave it open and switch over to Miter to generate one.
3. Create an API Token in Miter
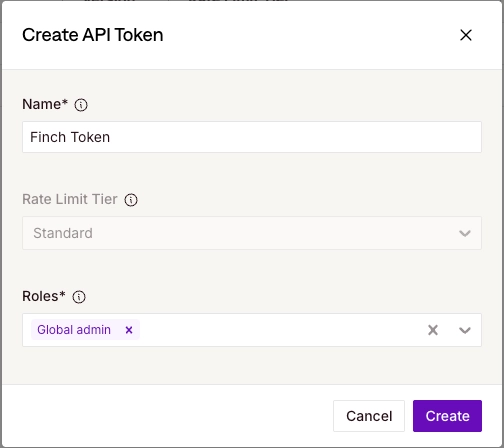
Inside Miter (Aside on the left), go to Settings → Miter API then click Create API Token and fill in:
Name:
Finch Token(or any label that helps you identify it later)Rate Limit Tier:
StandardRoles:
Global admin— required so Finch can read all the necessary data
Click Create to generate the token.
4. Copy the token
Miter will display the API User Token. Click Copy Token and paste it into Finch Connect. You can revisit this token in Miter at any time, so there's no risk of losing it if you close the dialog.
5. Paste the token into Finch Connect
Paste the token into Finch Connect, check "I've completed these instructions", and click Connect.