Ceridian Dayforce - Add an administrator [AUTOMATED]
Last updated: July 30, 2025
To connect your Dayforce account to this application you must set up a new admin user. Please follow the instructions below.
Before you start
Please make sure that you are a user with administrator rights before you follow these instructions. If you are not an administrator or are unsure, reach out to your HR team to confirm or give you admin rights.
NOTE: If you are not able to follow the instructions above, please contact your account representative and share that you would like to add this application as an External Administrator. CC the email provided in Finch Connect so we can see all communications and help troubleshoot.
Overview
To connect your Ceridian Dayforce account, you will need to complete the following steps, outlined in more detail in the section below:
Create an additional admin user in your Ceridian Dayforce system with the required permissions
Assign the user a username and temporary password
Confirm the reference code associated with the location you wish to connect
Input the following information into Finch Connect:
Company: the company name you use to login to your Ceridian Dayforce account
Username: the username of the user you create
Password: the temporary password you assigned to this user. This will be immediately rotated and secured
Reference code: the reference code associated with the location you are connecting.
NOTE: each location is assigned a unique reference code. If you wish to connect multiple locations, you will need to complete Steps 4 and 5 below for each location.
Instructions
Log in as an administrator to create a new role for your organization
Navigate to System Admin > Roles > + Add.
Name: Choose a descriptive name that indicates this role is for integration purposes
Description (Optional): Add a brief description of the role's purpose
Password Policy: Keep the default selected value
Reference Code: Use the same value as the Name field, in uppercase without spaces
Keep the other checkboxes blank
Click on “Save” on top left

Step 2: Configuring role permissions
Configure the permissions for the role you'll assign to the user.
Under System Admin > Roles in the left menu, select the role you created in the previous step
Permissions Needed for Organizational and Payroll data:
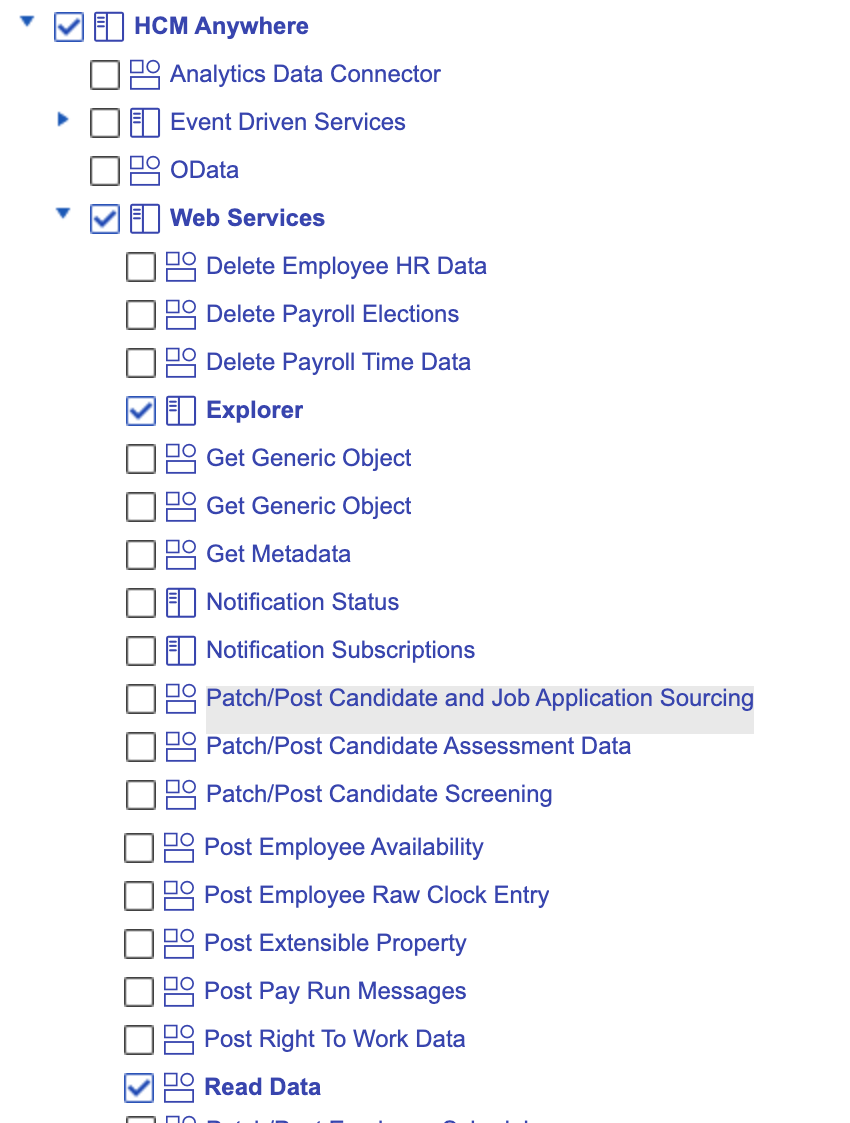
[ ] HCM Anywhere
[ ] Web Services
[ ] Explorer
[ ] Read Data
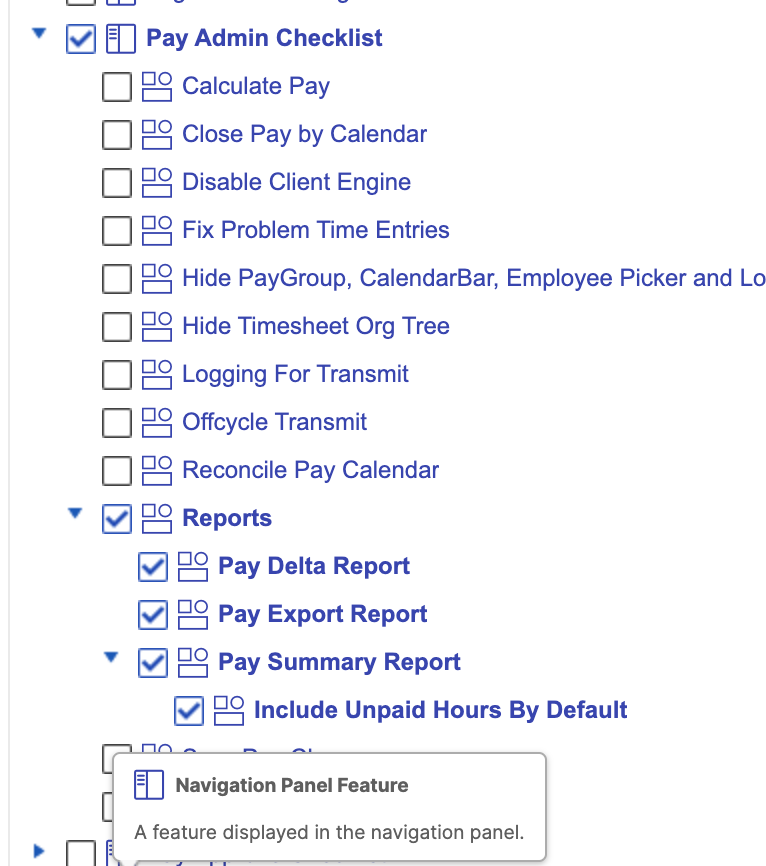
[ ] Pay Admin Checklist
[ ] Reports
[ ] Pay Delta Report
[ ] Pay Export Report
[ ] Pay Summary Report
[ ] Include Unpain Hours by Default
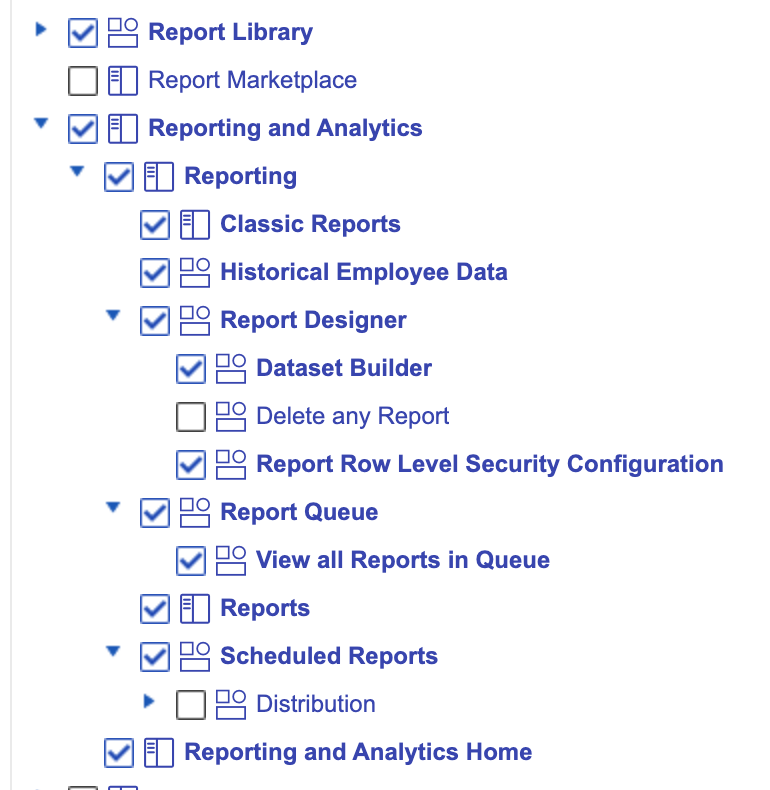
[ ] Report Library
[ ] Reporting and Analytics
[ ] Reporting
[ ] Classic Reports (if available)
[ ] Historical Employee Data
[ ] Report Designer
[ ] Dataset Builder
[ ] Report Row Level Security Configuration
[ ] Report Queue
[ ] View all Reports in Queue
[ ] Reports
[ ] Scheduled Reports
[ ] Reporting and Analytics Home
Permissions Needed for Benefits/Deductions:
These permissions are only needed for clients who are participating in the benefits product.
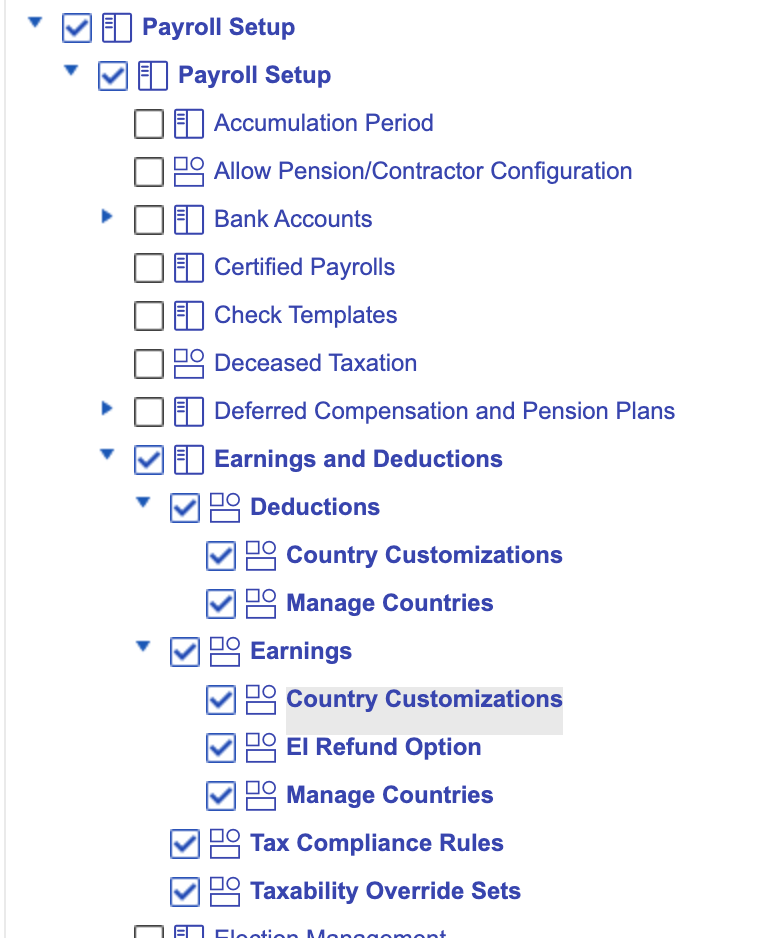
[ ] Payroll Setup
[ ] Payroll Setup
[ ] Earnings and Deductions
[ ] Deductions
[ ] Country Customizations
[ ] Manage Countries
[ ] Earnings
[ ] Country Customizations
[ ] EI Refund Option
[ ] Manage Countries
[ ] Tax Compliance Rules
[ ] Taxability Override Sets
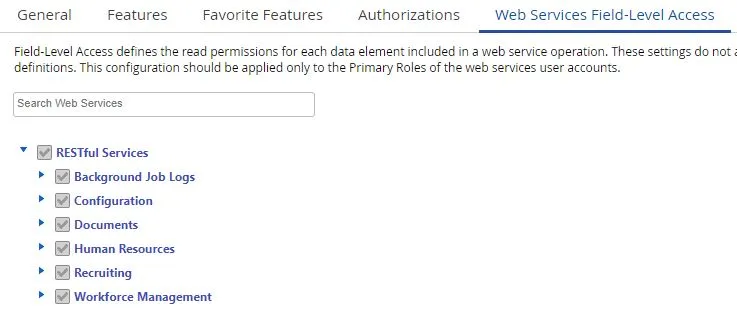
Click on the Web Services Field-Level Access tab and select the checkbox for RESTful Services
Navigate to System Admin > User > + New.
Expand the row to configure the user
Select the Properties tab and fill out the following information:
User Name: (Please use the email provided in Finch Connect)
Culture: English (US)
Approved: Ensure this is checked if it appears; this may not appear in all accounts.
Password: Fill in a temporary password
IMPORTANT: Make note of this as you will need to pass the username and temporary password securely through the Finch Connect screen at the end of the setup process
Click +User Role
Click on the User Roles column to reveal a dropdown menu
Assign the role you created in Step 1.
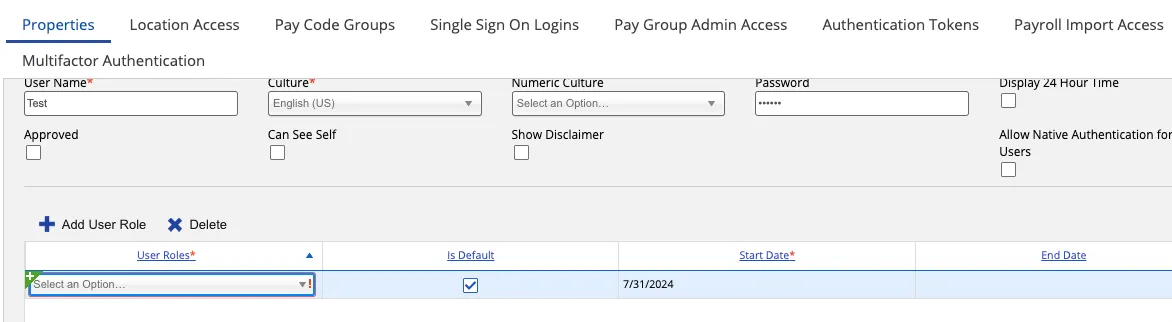
Start Date: Today
End Date: Leave blank; if this field is required, we recommend 2 years from today
Select the Location Address tab
Click +Add Location
Click on the Location column and ensure all locations you wish to connect are selected
Select the Pay Group Admin Access tab
Click +Add Pay Group
Click on the Pay Group column and ensure all pay groups you wish to connect are selected
Click the Save button on the top left corner of the page
After you have saved your progress, please ensure we have the correct privileges by checking if we have access to the Pay Admin feature. This feature is part of the Payroll Setup privilege group.
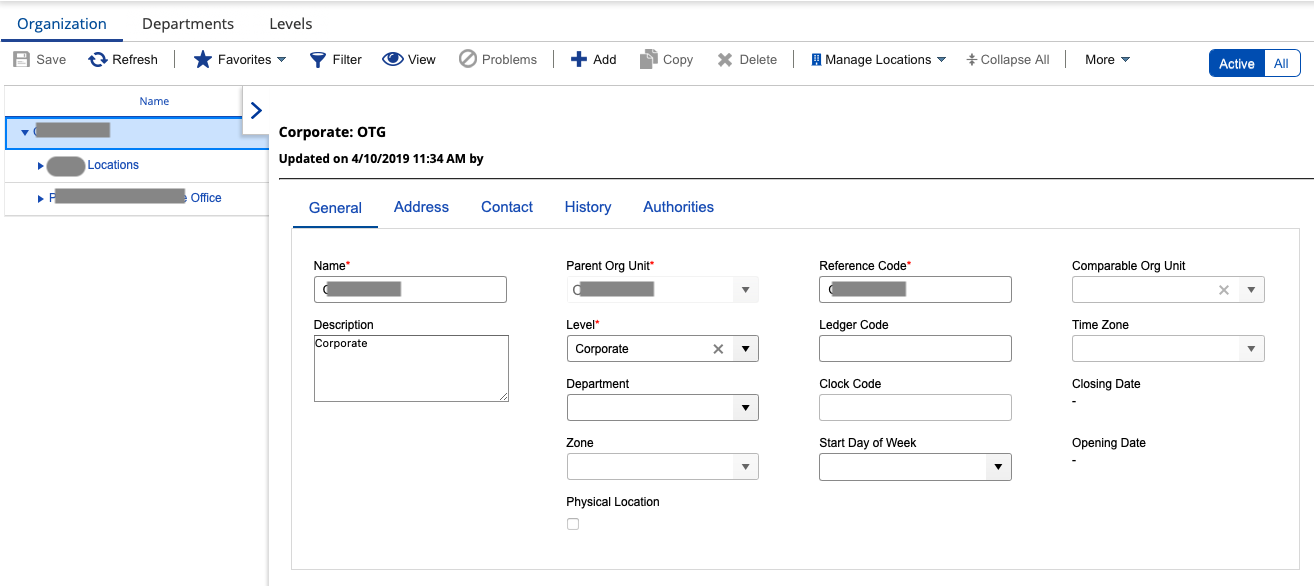
Step 4: Verify your company Reference Code
Context from the Ceridian Dayforce documentation: “Cross-reference codes, also known as reference codes and XREF codes, are used by Dayforce in imports and exports to integrate into other applications and systems used by your organization."
Navigate to Org Setup > Organization
Under the "Organization" tab, select the company you assigned to the user created in Step 3 (the company selected in "Location access")
Check the value in the Reference Code field. You will need to pass this information into Finch Connect
Step 5: Share the temporary credentials with Finch
Navigate back to the Finch Connect screen
Input the username and temporary password from Step 3
In the “Company” field, input the company name you use to sign into Ceridian Dayforce
In the “Reference Code” field, input the reference code from Step 4
Click Connect
NOTE: Repeat Steps 4 and 5 if you are connecting multiple locations.
FAQs